Quantcast
Channel: Kinder Craze
Viewing all 239 articles
Browse latest View live

Quick and Easy Bulletin Boards with Free Pennant Letters

$
0
0

Thank you to ASTROBRIGHTS® Papers for partnering with me on this blog post to create pennant letters for the classroom. I received payment, trade, and/or products from Astrobrights in exchange for promoting their products. However, all opinions stated are my own and I only promote brands and products that I use and love. This post also contains affiliate links. I receive a small commission each time someone makes a purchase through one of my links, which helps to support the blog.

It’s that time of year once again! Teachers are back in school, back in the full swing of things, and summer already feels like a distant memory. Of course, back to school season always seems to have a few surprises in store for teachers, students and administrators. The biggest surprise of all: staff changes that occur after the first week of school. We’re currently going through one of those big transitions at my school when a new first grade teacher, “Miss T”, was hired after the first week of school. Poor Miss T was ecstatic about her new teaching job, but more than a little overwhelmed by the empty classroom before her. While she wanted to instantly create the cutest classroom possible, she needed to focus her time, energy, and attention on content and building relationships with her brand new students.

Fortunately, I happen to teach right next door and I always have a full supply of Astrobrights paper and cardstock on hand for any decor emergencies. And with Parent Night nipping at our heels this week, I’m pretty sure the situation qualified as a decor emergency!

Miss T did a little hurried classroom shopping on her own and bought a few borders and basic decor items to start decorating. Eager to help, I asked if she had a theme in mind and her response was classic chalkboard.

Selecting A Color Palette

Every great classroom design begins with a strong color scheme. I wanted to help Miss T make a big impact with minimal effort, but first we need a little direction. We brainstormed possible color schemes and decided to keep the classic school theme going with our color palate. We selected red, green and yellow to compliment the chalkboard borders and calendar pieces that had been purchased.

Astrobrights makes the best, most vibrant papers for classroom use and we decided that Re-Entry Red®, Gamma Green® and Solar Yellow® were the perfect accent colors for Miss T’s chalkboard theme.

Astrobrights Papers in the Classroom | Kinder Craze kindergarten teaching blog

Make A Big Impact with Pennant Banners

The clock was ticking as we prepared for Parent Night, so we got right to work on a simple project that would make a BIG impact. You may recall the pennant banners that served as subject area headers on Markeda Brown’s first grade classroom when she won the Astrobrights Brightest Teacher makeover last year.

Astrobrights Papers in the Classroom | Kinder Craze kindergarten teaching blog

I loved those pennants so much because they were easy to print, prep and hang. And thanks to the durability of Astrobrights cardstock, no laminating was required!

FREE Pennant Letters for the classroom | Kinder Craze kindergarten teaching blog

The boards in Miss T’s classroom looked fantastic thanks to the bright paper and chalkboard boarders, but the room was so sparsely furnished that we needed to add a little extra impact to help the space feel a little less empty. I printed three subject headers for Miss T’s bulletin boards. The letters were printed in a pattern onto Re-Entry Red, Solar Yellow, and Gamma Green cardstock.

Stringing the trimmed letters into classroom banners was super-simple. I cut a 1.5″ slit near the top corners of each letter and strung them onto 7/8″ black grosgrain ribbon.

FREE Pennant Letter Banners for the classroom | Kinder Craze kindergarten teaching blog

The finished results made a big, beautiful impact in Miss T’s classroom.

FREE Pennant Letter Banners for the classroom | Kinder Craze kindergarten teaching blog first grade bulletin boards with pennant letter banners - Kinder Craze teaching blogfirst grade calendar bulletin board with pennant banners - Kinder Craze teaching blogfirst grade word wall bulletin board with Astrobrights pennant banner | Kinder Craze teaching blogUse Astrobrights paper to create a pennant letter banner - Kinder Craze teaching blog Use Astrobrights paper to create a pennant letter banner - Kinder Craze teaching blog

Shopping Guide

You can easily recreate the same look in your own classroom. Here are the materials and resources we used to create this look.

Re-Entry Red Astrobrights Cardstock
Gamma Green Astrobrights Cardstock

All three cardstock colors are included in this multipack of Astrobrights cardstock on Amazon:

We labeled Miss T’s word wall with Black Series Word Wall Alphabet Headers, which are available in my TpT store. Daily Five reading resources are from Lyndsey Kuster. Click any of the images below to add them to your classroom.

Word Wall Alphabet Headers from Maria Manore Gavin on TpT Ready, Set, Read FREE tools from Lyndsey Kuster Be a Reading Expert from Lyndsey Kuster

Miss T’s bulletin boards were also trimmed with fadeless paper and chalkboard theme borders and accent decor. Click any image below to purchase them on Amazon.

Free Classroom Pennant Letters

Add a bold pop of color to your classroom with my FREE Pennant Letters. Just click the image below to get started. Enter your email address and the pennants will be delivered right to your inbox. If you can’t find them, be sure to check your spam folder. I recommend using a personal email address, rather than a school email due to the high level of filters that administrators put on school email accounts.

I personally love the extra bold pop that the black pennant letters bring to the classroom. I printed all of my pennants on my laser printer, which is much more cost effective than an inkjet printer. If you’re concerned about draining your printer, a low-ink pennant style is also included in the download.

Here’s to a great school year that’s fun, engaging, and bright!

The post Quick and Easy Bulletin Boards</br> with Free Pennant Letters appeared first on Kinder Craze.


Rainbow Slime Made Easy with Elmer’s Slime Kits

$
0
0

Have your kids joined the slime craze? Slime has become the rage with children across all ages, which is just fine by me because it’s a nice distraction from electronic devices. After creating mess-free glitter slime earlier this summer, my little helpers joined me once again for another round of slime-y goodness. This time, we decided to try out the new Rainbow Slime Starter Pack from Elmer’s, along with Elmer’s Magical Liquid, which instantly turns glue into slime. We had a blast making three different batches of slime (which we combined to create rainbow slime) and I can’t wait to fill you in on the fun.

Thank you to Elmer’s for sponsoring this blog post. I received compensation and free product from Elmer’s in exchange for writing this post. All opinions are my own and I only support brands and products that I use and absolutely LOVE. This post also contains affiliate links. I receive a small commission when someone makes a purchase through one of my links, which helps to support the blog. 

Quick and Easy Rainbow Slime - Elmer's Rainbow Slime Starter Pack | Kinder Craze blog

As soon as they arrived, my young helpers couldn’t wait to dig in to the Elmer’s Rainbow Slime Starter Pack. It came with three bottles of Elmer’s Glitter Glue and an easy to follow recipe printed right on the box. We also had to gather a few additional basic supplies: contact lens solution, baking soda, three mixing bowls and spoons, plus measuring spoons.

(I wasn’t a fan of using my good kitchen bowls and spoons to mix glue and contact lens solution, so I purchased cheap materials from my local dollar store. You may want to do the same!)

Quick and Easy Rainbow Slime - Elmer's Rainbow Slime Starter Pack | Kinder Craze blogQuick and Easy Rainbow Slime - Elmer's Rainbow Slime Starter Pack | Kinder Craze blog

Once the supplies were gathered, we were ready to get our slime on! We followed the super-simple to follow directions. The first step was to empty two bottles of Elmer’s glitter glue into mixing bowls. (We saved the third bottle for Elmer’s Magical Liquid … keep reading to find out what made it magical!) It took some serious squeezing to completely empty the bottles, which was a great form of fine motor practice.

Quick and Easy Rainbow Slime with Elmer's Rainbow Slime Starter Pack | Kinder Craze blog

Once all the glue was squeezed into our mixing bowls, we followed the instructions and added 1/2 tablespoon of baking soda to each bowl of glue and it was time to start mixing!

Quick and Easy Rainbow Slime with Elmer's Rainbow Slime Starter Pack | Kinder Craze blog

After stirring in the baking soda, the girls checked the status of their mixture. No slime yet – just two bowls of slightly thicker than usual glue.

We followed the kid-friendly directions and added 1 1/4 tablespoons of contact solution, which really made things interesting. The slime was beginning to form and got pretty difficult to stir. (Note that it doesn’t matter which brand of contact solution you use – as long as it contains boric acid and sodium borate.)

Quick and Easy Rainbow Slime with Elmer's Rainbow Slime Starter Pack | Kinder Craze blog

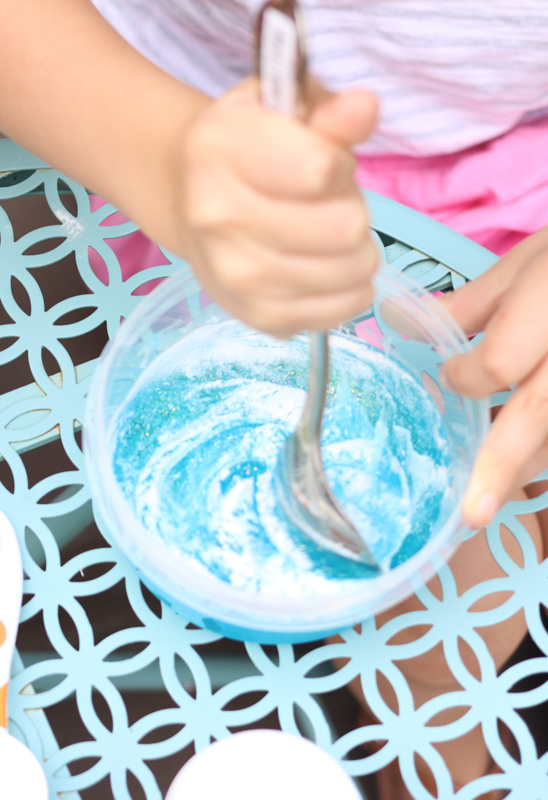
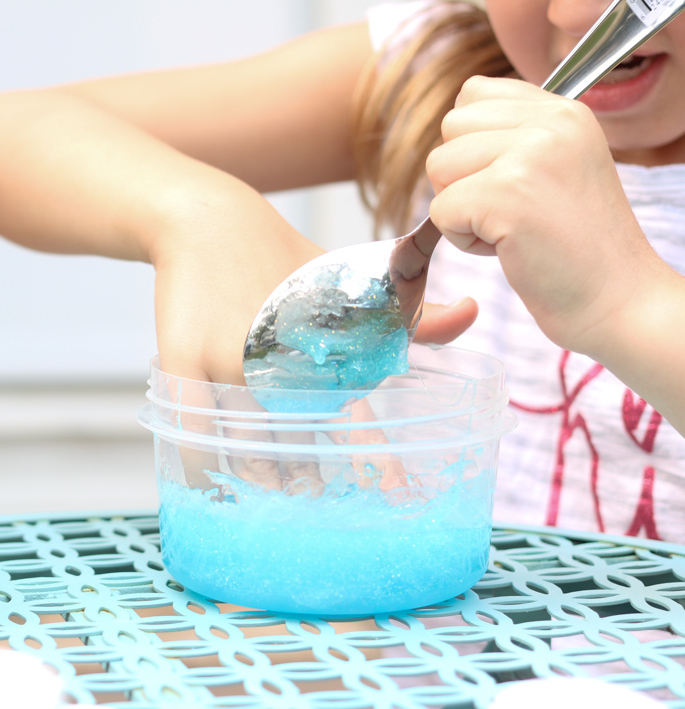
At this point, there was no other choice but to get their hands a little bit messy, which is great when you’re a kid! The girls used their hands to transform their mixtures from a sticky mess and into slime.

Quick and Easy Rainbow Slime with Elmer's Rainbow Slime Starter Pack | Kinder Craze blog          Quick and Easy Rainbow Slime with Elmer's Rainbow Slime Starter Pack | Kinder Craze blog

It took a little kneading, but the slime came together right in their hands.

Quick and Easy Rainbow Slime with Elmer's Rainbow Slime Starter Pack | Kinder Craze blog

We still had one batch of slime to complete to make rainbow slime. This time the girls worked together and we decided to try out Elmer’s new Magical Liquid.

Our slime creation began the same as any other batch: by squeezing a bottle of glitter glue into a bowl.

Quick and Easy Rainbow Slime with Elmer's Rainbow Slime Starter Pack | Kinder Craze blog

The nice thing about Elmer’s Magical Liquid was that there was no measuring, worrying about proportions, or reading contact lens solution ingredients. Each bottle of Magical Liquid is a premeasured, perfect amount to mix with one 6 ounce bottle of glue. The girls were very excited to see just how magical the liquid was.

The suspense was palpable as they dumped the Magical Liquid into the bowl of glue.

Quick and Easy Rainbow Slime with Elmer's Rainbow Slime Starter Pack | Kinder Craze blog

Then it was time to stir…

Quick and Easy Rainbow Slime with Elmer's Rainbow Slime Starter Pack | Kinder Craze blog

Quick and Easy Rainbow Slime with Elmer's Rainbow Slime Starter Pack | Kinder Craze blog

And get their hands a little messy.

Quick and Easy Rainbow Slime with Elmer's Rainbow Slime Starter Pack | Kinder Craze blog

Sure enough! The bottle of Elmer’s Magical Glue helped us easily create a perfect batch of slime.

Quick and Easy Rainbow Slime with Elmer's Rainbow Slime Starter Pack | Kinder Craze blog

Once we had our three small batches of slime, it was time to combine them to create rainbow slime, which truly tripled the fun!

Quick and Easy Rainbow Slime with Elmer's Rainbow Slime Starter Pack | Kinder Craze blog

Once the rainbow slime was formed, the girls were completely captivated and lost in a world of slimy fun. Elmer’s truly made slime creation simple with their new slime kits and Magical Liquid. You can grab any of these materials at your local retailer that carries Elmer’s products or order one of Elmer’s slime kits on Amazon.

Quick and Easy Rainbow Slime with Elmer's Rainbow Slime Starter Pack | Kinder Craze blog

Thank you to Elmer’s for helping make slime creation easy and FUN! You can learn more about Elmer’s products and discover even more fun inspiration for kid’s crafts the Elmer’s website, as well as InstagramFacebook, and Twitter.

The post Rainbow Slime Made Easy</br> with Elmer’s Slime Kits appeared first on Kinder Craze.

Easy Vibrant Books to Teach Color Words

$
0
0

I love teaching color words in kindergarten. Unlike most sight words, the color words are relevant to a child’s world, are easy to conceptualize, and can creatively be put to use in the classroom. During our color word study, we learn a new color word every day and my students have so much fun with our color activities. It’s a lot of words in a short amount of time, but they don’t mind because it’s just so fun. And for many students, the color unit is just what they need to jump start their color word mastery. Other students need more time. Sound familiar? Today I’m thrilled to share a simple, but vibrant, booklet to help your students get one step closer to color word mastery for FREE. My students loved this project and I know that yours will too.

Thank you to ASTROBRIGHTS® Papers for sponsoring today’s post. I received payment from Astrobrights in exchange for writing this post. All opinions are my own and I only support brands and products that I use and absolutely love. This post also contains affiliate links. I earn a small commission each time someone makes a purchase through one of my links, which helps to support the blog. 

FREE color word book template - use Astrobrights paper to give it an extra POP of color | Kinder Craze blog

In my experience best way to help students that are struggling to learn their sight words is to provide opportunities for students to really study the letters in a meaningful way. Flashcards alone just won’t cut it if a child is truly struggling. But cutting, unscrambling, and gluing can make a meaningful difference.

FREE color word book template - use Astrobrights paper to give it an extra POP of color | Kinder Craze blog

A little bit of novelty also goes a long way. And there is something so magical to six year olds about a book with black pages. That’s right – black pages! I used Astrobrights Eclipse Black™ paper as the pages of the book. My students cut and glued vibrant letters to spell a different color word onto each page of their books. The bright Astrobrights colors really popped against the black background and my students loved making the pages of their books.

FREE color word book template - use Astrobrights paper to give it an extra POP of color | Kinder Craze blogFREE color word book template - use Astrobrights paper to give it an extra POP of color | Kinder Craze blog FREE color word book template - use Astrobrights paper to give it an extra POP of color | Kinder Craze blog

The entire time my students worked, I was absolutely amazed at their level of enthusiasm. The Christmas season is in full swing in my classroom and so is my students’ excitement. They were over the moon about this project and it brought a few moments of much-needed peace to my classroom.

FREE color word book template - use Astrobrights paper to give it an extra POP of color | Kinder Craze blog

After each page of the book was complete, it was time to create a cover. I did a rough cut of letters that spelled “Colors”, displayed the word on our classroom Smartboard, and let students choose their own letters to spell the title. They did so great with that task as well!

FREE color word book template - use Astrobrights paper to give it an extra POP of color | Kinder Craze blog FREE color words book template - use Astrobrights paper to give it an extra POP of color | Kinder Craze blogFREE color word book template - use Astrobrights paper to give it an extra POP of color | Kinder Craze blog

I love, love, love how these simple little books turned out.

FREE color word book template - use Astrobrights paper to give it an extra POP of color | Kinder Craze blog

Color Word Book Shopping Guide

Here are the exact Astrobrights paper colors I used to create a vibrant “Colors” book with my students. Click any of the links or images below to start shopping.

Eclipse Black™
Re-Entry Red™
Cosmic Orange™
Solar Yellow™
Martian Green™
Lunar Blue™
Outrageous Orchid™

Download a FREE Colors Book Template

If your students are struggling to learn their color words, this project is for you! You can download all of the pages you need to create color books with your students. My students only spelled out the words red, orange, yellow, blue, green and purple; but I included black, brown, pink, white, and gray in the set in case you have another creative use for the letters. The download also includes two options for printing: one set displays proper spelling of each color word, the other set prints with scrambled letters for an additional challenge. Print the pages that are the best fit for your students.

Click the image below to download the materials to create a vibrant Colors book for FREE! Please note that most school email filters block the delivery of emails from me. I highly recommend signing up for the freebie using your personal email account. If you don’t see the download in your inbox, be sure to check your spam folder.

FREE color word book template - use Astrobrights paper to give it an extra POP of color | Kinder Craze blog

Wishing you a great and colorful week!

The post Easy Vibrant Books<br> to Teach Color Words appeared first on Kinder Craze.

Easy Cat in the Hat Art for Reading Month

$
0
0

Reading month is coming to a close, but it’s not too late to incorporate a little celebratory art into your classroom – especially if you are counting down the minutes and looking for an easy way to fill the time until spring break can finally begin. Here is the perfect Cat in the Hat-inspired art project to share with you that’s super-easy to create, is engaging for students, and looks amazing.

This post contains affiliate links. I earn a small commission each time someone makes a purchase through one of my links, which helps to support the blog.

easy Cat in the Hat inspired art to celebrate reading month | kindergarten art project | painting for kids | Kinder Craze blog

First of all, I have got to hand it to my girl Jennifer from First and Kinder Blue Skies. She makes the best directed drawing activities that are super-simple, but look like a million bucks after the children draw them. Jennifer has a bunch of directed drawing activities for various seasons and academic content available on TpT – check them out now and thank me later – but wait until after you see the rest of these art projects!

Anyways, I wanted to recognize reading month and prepare for my school’s upcoming Open House, but I always seem to be short on time in the classroom (this year more than ever!) So I needed something quick and easy that would make an impact. We had just finished reading Dr. Seuss’ classic story “The Cat in the Hat” in celebration of the late author’s birthday and it was the perfect opportunity to introduce a fast art project.

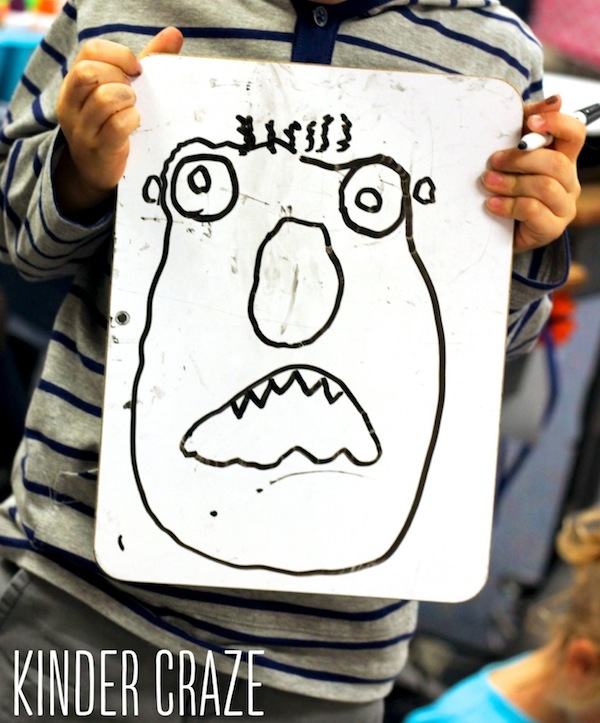
So I stopped by the First and Kinder blog, downloaded the free Cat directed drawing activity, and proceeded to have a quick drawing lesson with my students on their whiteboards. I ALWAYS have my students “practice” drawing the picture on their personal whiteboards before we draw on paper. It’s easy to erase and correct mistakes with a whiteboard and a dry-erase marker and I find that the practice draw helps my students gain better spatial awareness for how the shapes will fit together on the page.

This is an example of a different directed drawing that my students completed in the fall when we read the book Go Away, Big Green Monster! It’s ALWAYS worthwhile to practice drawing on a whiteboard first.

On this particular day, we went right from practicing to drawing the Cat. (I always use white cardstock for drawing and paint artwork in the classroom. It absorbs the water nicely and the cardstock doesn’t curl like lightweight paper does when you add paint.) Once every child had a sheet of cardstock, I carefully led them through the exact same steps to recreate their picture on the white paper. It took about 20 minutes from start to finish for the class and I to gather materials, practice drawing on whiteboards, and do a second directed draw on cardstock.

My kindergarten students always draw their pictures with a pencil, and the next step is to trace on top of all the pencil lines with a black crayon. I find that the black crayon makes more of a bold visual impact than pencil, but it also serves a helpful function. We usually paint our directed drawings with watercolor paints and the wax of the black crayon creates just enough of a functional barrier to help keep the watercolors confined to separate areas on the cardstock.

After all that drawing and tracing, the only thing left to do was add color to our cats! The real Cat in the Hat is a bold tri-color white, black and red and I knew watercolor paints wouldn’t give that crazy cat the high-contrast look he deserved.

I knew that the bold colors and great coverage of tempera paint would be so much better for this project than watercolors. But I was in a hurry and I needed a quick, easy way to make these cats good. Kwik Stix to the rescue! I first discovered Kwik Stix a few years ago and was amazed at how easy they were to create rainbow paintings with my class. You see, Kwik Stix are solid tempera paint. Yes, you read that correctly. Solid. Which means no drips, no spills, no mess. Just gorgeous color with great coverage. Kwik Stix are sort of a cross between a glue stick and an oil pastel. Just turn the base to push up the paint, then gently rub the Kwik Stix onto paper for an easy way to “paint.”

I knew that Kwik Stix would be an ideal way to finish our Cat art projects without taking a lot of time or making a mess. Students came to see me two at a time to add black and red paint to their Cat drawings. They didn’t need paint shirts or have to wash their hands afterward!

easy Cat in the Hat inspired art to celebrate reading month | kindergarten art project | painting for kids | Kinder Craze blogeasy Cat in the Hat inspired art to celebrate reading month | kindergarten art project | painting for kids | Kinder Craze blog

I LOVE how adorable their Cat “paintings” turned out!

The student art projects were complete, but I had one last project that I needed their help with. I used our classroom projector to trace a giant Cat in the Hat onto white bulletin board paper. I outlined the Cat with a black marker and each student took a turn using Kwik Stix to help paint the Cat.

easy Cat in the Hat inspired art to celebrate reading month | kindergarten art project | painting for kids | Kinder Craze blogeasy Cat in the Hat inspired art to celebrate reading month | kindergarten art project | painting for kids | Kinder Craze blog

Our finished Cat looked amazing, the students loved being a part of a large-scale piece of artwork and I loved that there was zero mess. The paint went on smoothly, coated nicely, and dried instantly. It look less than 15 minutes for the entire class to have a turn painting part of the Cat. LESS THAN 15 MINUTES! Praise the Lord, because time is a valuable commodity in my kindergarten classroom, as I’m sure it is for you as well.

easy Cat in the Hat inspired art to celebrate reading month | kindergarten art project | painting for kids | Kinder Craze blog easy Cat in the Hat inspired art to celebrate reading month | kindergarten art project | painting for kids | Kinder Craze blog  easy Cat in the Hat inspired art to celebrate reading month | kindergarten art project | painting for kids | Kinder Craze blog

All of the classrooms in my school decorated their doors with to celebrate reading month. Our giant Cat in the Hat was the perfect decoration for my classroom door, and the painted Cats complimented it so well!

easy Cat in the Hat inspired art to celebrate reading month | kindergarten art project | painting for kids | Kinder Craze blogeasy Cat in the Hat inspired art to celebrate reading month | kindergarten art project | painting for kids | Kinder Craze blogeasy Cat in the Hat inspired art to celebrate reading month | kindergarten art project | painting for kids | Kinder Craze blog

A common question I am asked about Kwik Stix is how long they will last. I own two sets of Kwik Stix, which I used to create eight rainbow “paintings” a few years ago, then we used the same sets to create twenty Cat pictures, plus the giant Cat in the Hat for my door decoration. They didn’t dry out at all in all that time and there is still plenty of leftover paint in those Stix.

STOCK UP ON SUPPLIES
Want to try these projects in your classroom? Click any of the images below to purchase supplies on Amazon!

And there you have it! An easy, adorable, Cat in the Hat inspired student art project to help celebrate reading month!

The post Easy Cat in the Hat Art</br> for Reading Month appeared first on Kinder Craze.

Why I Love Blocks Rock! Engaging STEM Skills Through  Hands-On Game Play

$
0
0

Summer is here and it is a welcome change of pace from the oh-so-busy routine of the school year. No more early wake ups, heaps of home work, and cramming so many activities into a single day. Instead, it's time to recharge the family batteries, stay up a bit longer, linger in bed and (most importantly) play! And I don't mean video games. I mean good, old fashioned running, swimming, bike riding, hide-and-go-seeking, laughing, smiling, get out and play time. Mix in a few trips to the library and the thrill of discovering a new favorite book and you're on track to setting your kids up for a great summer. But what about spatial and mathematic development? Thanks to Blocks Rock!, I have discovered just the ticket to keeping spatial skills sharp in a way that's super-fun for the whole family (even for Mom and Dad!) I can't wait to tell you about my new favorite game and you're going to love the discount code and giveaway that Blocks Rock! is generously providing for Kinder Craze readers. Ready to see the game your whole family is going to love?

Thank you to Blocks Rock! for sponsoring this post. While this was a sponsored opportunity, all content and opinions expressed here are my own. This post also contains affiliate links. I earn a small commission each time someone makes a purchase through one of our links, which helps to support the blog. I sincerely hope you enjoy today’s post!


Getting Started with Blocks Rock!

The Blocks Rock! game comes in a kit with two decks of playing cards (with two different levels of challenges), 24 solid wood building blocks, a game play bell, and a convenient carrying case. The game is super-easy to set up, just distribute the blocks equally between both players, choose a deck of cards for your game and set them face down, then place the bell within easy reach of both players.

It wouldn't be right to try out a new game for kids on my own, so I invited two sisters – Emma, age 8, and Cobie, age 11, to help me give Blocks Rock! a spin.

When we were ready to begin, Emma drew a card off the top of the pile and placed it face up for both girls to see.

Playing the Game

The card illustrates a block construction that both players compete to recreate in the shortest amount of time. The Level 1 deck features simple constructions, while the Level 2 deck challenges players to recreate more complex creations. Since these girls were older, we used the Level 2 deck. As soon as the first card was flipped, both girls raced to complete their structures.

Even with the level 2 deck, some towers were relatively simple, while others were a bit more complex.

The first player to recreate the image displayed on the card signals completion by hitting the call bell.

Even though she was three years younger than her competition, Emma quickly demonstrated her incredibly fast skills and attention to detail.

Again …

And again! I'm telling you this girl was fast.

We had to decide pretty early on how much we wanted to be sticklers for detail – particularly with the triangles. (The triangle blocks included with the game were isosceles triangles so their orientation mattered.) Since these girls were older, we all agreed that you had to be the first person to construct a perfect arrangement with the triangles oriented correctly and lined up exactly as the picture demonstrated to win the round. If someone rang the bell before perfecting their tower, the other player would have a chance to swoop in and correctly recreate the structure to win the round.

After losing several rounds to her little sister, Cobie finally finished her tower first and excitedly rang the call bell – only to discover that her tower was ever-so-slightly misconstructed.

Can you see the problem? Look at the lower triangle in her tower and compare it to the drawing. Yup, the triangle block was placed sideways, which meant Cobie begrudgingly watched her sister swoop in with a correctly built tower to win the round.

After watching Emma repeatedly school her big sister in Blocks Rock!, we upped the challenge for her. I handed Cobie the camera and stepped in to see if I could dethrone the queen. As it turns out, Emma was really fast. She beat me for a few rounds and I was determined to beat an eight year old at the game. I finally beat her during the fourth card that we played.

And then I got to win on a technicality – thanks to those green triangles.

I wasn't the only one who was determined to win. After seeing that someone could successfully built a tower faster than Emma, Cobie wanted back in the game for the satisfaction of a win. It took a few rounds, but it finally happened.

The face of victory!

And that right there is the reason why all three of us fell in love with Blocks Rock! It was fun, interactive, fast-paced, and the oldest person didn't have an automatic advantage. The fact that the youngest player was so good made us even more competitive (in a friendly way) to win a round.

Once we had been playing for a while, it was time to add up the points and see who had won. You may have noticed a small number in two of the corners of each card. Each tower was worth a certain number of points (from 1 to 4) and each time a person won a round, they kept the card from that round.

How to Win the Game

Figuring out who had won the game was simple – each player just added up the total number of points in his or her possession. Figuring out Cobie's total points was even more simple. She won a single round that was worth 4 points.

Her sister, Emma, had a bit more math to do. Emma added up her cards to determine a total score of 24 points. She was the winner by far. I'm sure you already figured this out, but Blocks Rock! packs an extra educational punch through addition practice. It's great mental math to add the points from a stack of individual cards.

Don't let the addition make you shy away from playing this game with younger children. If the players are too young to add the points, it's perfectly ok to just count how many cards each player has. So simple and so easy to adapt!

With a whopping 24 points, Emma was the reigning champ!


Additional Blocks Rock! Challenges on the FREE App

Ever since I became a mom, I've found myself stepping away from screens and technology – especially with children. I fear that most children have far too much exposure to screens and technology and I love any opportunity to replace screen time with hands-on, care-free, constructive manipulation of materials. That being said, I am kinda impressed with the Blocks Rock! app (available for iPad and Android) – which is free to download. The app has new challenges for game play that are much more complicated than the playing cards which come in the game. Players are still required to build physical versions of the images displayed on the tablet, they just use the app to generate challenges, rather than flipping a card. I might not be chasing after technology, but I do understand how screen time can be an incredible motivator or a special treat for a child. It's also a great way for a child to spend their daily screen time – since it involves a screen but is far more engaging than playing a video game or watching TV.


Blocks Rock! and STEM Development

Ok, so we know that Blocks Rock! is fun to play. We also know that it helps with spatial development and comes with the added bonus of addition practice. But can you believe that Blocks Rock! actually helps to develop critical STEM skills?

Sounds a little far fetched? I kinda thought so too, but I was reading up on some of the research on the Blocks Rock! website and learned about an interesting study from the Indiana University Department of Psychological and Brain Sciences:

This study corroborates with past research that structured block play needs to be a part of the young student’s classroom experience. With block-building games, like Blocks Rock!, being played, students will develop higher spatial reasoning abilities.

These students with higher spatial reasoning abilities will have a higher likelihood of furthering their education and future careers in STEM, a field that the United States so desperately needs to improve.

Save 10% on Blocks Rock!

I truly cannot say enough good things about this fabulous game that is so simple, but so much fun. If you're looking for a new way to keep the kids entertained this summer or for a great addition to your family's game collection – this is it! Blocks Rock! is available on Amazon and it is one purchase that you will not regret! Best of all, Kinder Craze readers can save 10% on Amazon if they purchase Blocks Rock! on Amazon. Just add Blocks Rock! to your cart and use promo code STEM2018 when you enter your payment information. It's super-simple and it's a great deal.


Enter to Win a Free Blocks Rock! Game

The only thing better than playing Blocks Rock! is winning a free game to play with your family. And one lucky Kinder Craze reader will get to win a free Blocks Rock! game for their home or classroom. Ready for your chance to win? Use the rafflecopter below to enter – good luck!

a Rafflecopter giveaway

The post Why I Love Blocks Rock!</br> Engaging STEM Skills Through</br>  Hands-On Game Play appeared first on Kinder Craze.

Twinkle Twinkle You’re A Star! Classroom Design with Schoolgirl Style & Carson-Dellosa

$
0
0

Back to school season is just around the corner and it's already time to start classroom setup. This is hands-down my favorite part of going back to school. There's just something so fun about selecting the perfect decor and watching it all come together in a classroom. Ever since my friend Melanie from Schoolgirl Style launched her new product lines with Carson-Dellosa, I have been dying to set up a classroom using the pieces she designed. I also wanted to push myself to design a classroom on a budget and a bless another teacher with a new design. I can't wait to tell you a little more about this special classroom and the gorgeous “Twinkle Twinkle You're a Star” product line from Carson-Dellosa. This post is a good one so grab a coffee, settle in, and get ready to pin your favorite images!

Thank you to Carson-Dellosa for sponsoring this post. This post also contains affiliate links. I earn a small commission each time someone makes a purchase through one of my links, which helps to support the blog. All opinions stated are my own and I only support brands and products that I use and truly love. I hope you enjoy reading today's post as much as I enjoyed sharing it with you. 

Twinkle Twinkle You're a STAR! classroom theme | classroom tour | classroom decor | classroom setup | rainbow classroom theme | back to school | Kinder Craze blog


A Little About the Classroom

One of the greatest blessings that this blog has brought into my life is the ability to share the fruits of my labor with other teachers and students. When Carson-Dellosa approached me about sharing their new Twinkle Twinkle You're a STAR! product line from Schoolgirl Style, I knew the perfect place to showcase the collection: the Learning Center at my school. When students at my school need a little extra attention or guidance with their studies, they are referred to the Learning Center for some personalized small group instruction with Mrs. Amy Perna – our Learning Center coordinator.

Some students come to Mrs. Perna because they need an extra challenge beyond the classroom curriculum, but many students come to her for additional support. The Learning Center services students in grades K-8, and the room is designed to assist students of all ages. The young children LOVE coming to visit Mrs. Perna, but the older students don't always have the same motivation.

Amy's room has always been neat, tidy, organized, and inviting. I just wanted to breathe a little life into the space and make it a place where students of all ages LOVE spending their time. Here are a few photos I took of her classroom a while back.

Twinkle Twinkle You're a STAR! classroom theme | classroom tour | classroom decor | classroom setup | rainbow classroom theme | back to school | Kinder Craze blog Twinkle Twinkle You're a STAR! classroom theme | classroom tour | classroom decor | classroom setup | rainbow classroom theme | back to school | Kinder Craze blog

As you can see, the classroom was functional for students and Amy's unique classroom needs. I just wanted to pop a little color into the space. I also wanted to challenge myself to transform in the room in a few special ways.

My first challenge was not to rely upon any lanterns or other decor hanging from the ceiling. Many students who come to see Mrs. Perna struggle with attention and need a little extra nudge to stay focused on the task at hand. I love using lanterns in the classroom, but they weren't a good fit for this classroom setting. I also know that many teachers are not permitted to hang any type of decor from the ceiling in their classrooms by order of the fire marshal. This classroom design proves that you do not need to have lanterns, poms, fans, or any other hanging decor to create a unique and special classroom space.

I also pushed myself to design an entire classroom with a budget in mind. After 12 years of teaching in a Catholic school, I know all about tight budgets and I know the pressure teachers feel about creating an attractive classroom when they are just trying to make ends meet. The only new materials purchased for Amy's classroom were consumable items: Fadeless paper, borders, cardstock, printables, posters, and cutouts from Carson-Dellosa. All of the furniture and accessories were already part of Amy's classroom decor or were items traded/discarded by other teachers (including a few items that were in my basement at home!)

Now that you know a little about Mrs. Perna's classroom and my goals for her new decor, are you ready to see her Twinkle, Twinkle You're a STAR! theme classroom from Carson-Dellosa and Schoolgirl Style?

Twinkle Twinkle You're A Star Classroom Tour

Mrs. Perna's new Learning Center is light, bright, and full of fun. As children look around the room, they are surrounded by inspirational messages reminding them to follow their dreams and believe in themselves. Since so many children who enter this room are struggling and frustrated, it is important that they are encouraged to persevere and follow their dreams.

Twinkle Twinkle You're a STAR! classroom theme | classroom library | flexible seating | alternative seating | classroom tour | classroom decor | classroom setup | rainbow classroom theme | back to school | Kinder Craze blog

Selecting a Color Scheme

The thing I love most about the Twinkle Twinkle You're a STAR! collection is how versatile it is. The set has classic chalkboard-style decor and really beautiful borders with a rainbow of dots or vertical stripes. The beauty of the mulit-color borders is how well they compliment so many classroom color schemes.

Like many classrooms in my school, Amy's room features a red accent well. That's right – red. The bright red walls came with the school when we moved in to our new building a few years back and they are pretty low on the school beautification project list. They will stay red as long as they are functional and not in need of a fresh coat of paint – which makes it tricky to plan a classroom color scheme around.

A chant that young students are familiar with goes “you get what you get and you don't throw a fit.” That's kind of how classrooms go. A teacher moves in to the room, sees the available space, and tries to make the best of it – without throwing a fit. When I began planning Mrs. Perna's classroom I knew that I would need to incorporate the red wall into her classroom design. Before starting this project, if you would have told me that I would knowingly incorporate lime green and pink accents into a room with a red wall and love how it turned out, I probably would have laughed in your face. But thanks to the Twinkle, Twinkle You're a STAR! collection, it all came together and I love it!

Twinkle Twinkle You're a STAR! classroom theme | classroom library | flexible seating | alternative seating | classroom tour | classroom decor | classroom setup | rainbow classroom theme | back to school | Kinder Craze blog

Decorating the Bulletin Boards

As soon as I laid eyes on the Rainbow Big Dots straight border that Melanie designed, I fell madly in love and I knew I had to incorporate it in this classroom design. It had the most beautiful bright rainbow of colors (including red, which tied perfectly into the accent wall!) I also wanted to add a touch of black to create a little contrast and enhance the chalkboard style of the Twinkle Twinkle collection. The Black with Polka Dot and White with Polka Dot straight borders from Schoolgirl Style added just the pop of contrast that I needed. I used a simple black scalloped border to keep the boards from looking too busy. (I also wanted to add a pop of white around the green chalkboard, so I flipped the black border over and used the white side to trim the chalkboard.)

Twinkle Twinkle You're a STAR! classroom theme | classroom library | flexible seating | alternative seating | classroom tour | classroom decor | classroom setup | rainbow classroom theme | back to school | Kinder Craze blog

The coordinating large and mini star cutouts from Schoolgirl Style were placed on various boards throughout the room as a finishing touch.

Selecting the perfect bulletin board paper took careful consideration. The “azure” shade of Fadeless paper from Pacon was a beautiful compliment to the red accent wall and it coordinated nicely with the rainbow shades in the Twinkle Twinkle collection. I absolutely love how all of the boards in this classroom turned out. (The printable alphabet is available in my TpT store.)

Twinkle Twinkle You're a STAR! classroom theme | classroom library | flexible seating | alternative seating | classroom tour | classroom decor | classroom setup | rainbow classroom theme | back to school | Kinder Craze blog

Twinkle Twinkle You're a STAR! classroom theme | classroom library | flexible seating | alternative seating | classroom tour | classroom decor | classroom setup | rainbow classroom theme | back to school | Kinder Craze blog


Decorating Above the Windows

The space above each window in Amy's classroom was pretty awkward to work with. They aren't quite big enough to be functional and they aren't bulletin boards – they're just an unusual glossy white surface. All of the classrooms on the first floor of my school have them and I quickly learned that the best way to cover the space is to attach fadeless paper with clear packing tape around the edges and use loops of packing tape to hold the border in place.

Twinkle Twinkle You're a STAR! classroom theme | classroom library | flexible seating | alternative seating | classroom tour | classroom decor | classroom setup | rainbow classroom theme | back to school | Kinder Craze blog

Many of the inspirational posters that you see displayed above the window are available at teacher supply stores or carsondellosa.com. The traditional poster size was too big for Amy's classroom windows, so I used the classroom printables available online and printed them at 170%. They were a perfect fit!

The “Welcome” and “Dream Big” pennant banners were also printables from Schoolgirl Style.

Twinkle Twinkle You're a STAR! classroom theme | classroom library | flexible seating | alternative seating | classroom tour | classroom decor | classroom setup | rainbow classroom theme | back to school | Kinder Craze blog

Twinkle Twinkle You're a STAR! classroom theme | classroom library | flexible seating | alternative seating | classroom tour | classroom decor | classroom setup | rainbow classroom theme | back to school | Kinder Craze blog

I printed the “Follow Your Dreams” letters and cut the out to hang above the windows, but these are also available as a traditional bulletin board set from Carson-Dellosa.

Twinkle Twinkle You're a STAR! classroom theme | classroom library | flexible seating | alternative seating | classroom tour | classroom decor | classroom setup | rainbow classroom theme | back to school | Kinder Craze blog

The space above Mrs. Perna's classroom windows is bright, welcoming, and absolutely perfect!

Twinkle Twinkle You're a STAR! classroom theme | classroom library | flexible seating | alternative seating | classroom tour | classroom decor | classroom setup | rainbow classroom theme | back to school | Kinder Craze blog


Creating a Cozy Classroom Library

Like most classrooms, Amy also has a little library set up for her students. Classroom libraries will always have a special place in my heart and I wanted to make this corner extra special to encourage a love of reading in all children who come to visit the Learning Center.

Twinkle Twinkle You're a STAR! classroom theme | classroom library | flexible seating | alternative seating | classroom tour | classroom decor | classroom setup | rainbow classroom theme | back to school | Kinder Craze blog

All of the books in Amy's library had been contained in dark blue book boxes, but I wanted to inject a little more color into the space. As luck would have it, another teacher just a few doors down had an assortment of neon book boxes from Really Good Stuff. I'm currently helping that teacher to decorate her nautical them classroom – which is perfect because we traded her clashing rainbow neon bins for Amy's dark blue bins. I added in a few red bins that I had in storage to coordinate with that red wall and the rainbow arrangement was the perfect compliment to the Twinkle Twinkle classroom decor.

Twinkle Twinkle You're a STAR! classroom theme | classroom library | classroom tour | classroom decor | classroom setup | rainbow classroom theme | back to school | Kinder Craze blog

The books in each bin have already been sorted by genre and theme. Amy plans to add library labels to the bins later this summer. In the meantime, we added mini star cutouts from the Twinkle Twinkle collection onto the front of each bin. If you find yourself short on time and need your classroom ready in a hurry, don't panic. The same thing happened to me and it was ok. Just do the best you can and improvise. And maybe add a few cute cutouts to get you by 🙂 Click here for tips on how to organize and set up your own classroom library.

Twinkle Twinkle You're a STAR! classroom theme | classroom library | book bins | library bins | library organization | classroom tour | classroom decor | classroom setup | rainbow classroom theme | back to school | Kinder Craze blog

Once the bins were set up and organized, all that was missing was a little cozy seating! We added some super-simple, inexpensive seating to Amy's classroom library. The black and white polka dot rug shown above (similar here) fit perfectly with the decor and helped to define the space. Amy already owned a pink saucer-style chair that looked fantastic with her new Twinkle Twinkle decor. I am STILL in awe of the fact that a bright pink chair actually looks nice positioned in front of a bright red wall!

Twinkle Twinkle You're a STAR! classroom theme | classroom library | flexible seating | alternative seating | classroom tour | classroom decor | classroom setup | rainbow classroom theme | back to school | Kinder Craze blog

Like many classrooms at my school, Amy has to work around a giant metal heating/ac unit along one wall. It has an air vent that runs along the bottom which can't be blocked and the custodian needs easy access to the unit throughout the school year. The room would look to sparse if the heating unit were left plain, so we attached Black with Polka dots straight border around the edges to create the visual effect of a bulletin board. I accented the space by printing “Dream Big Little One” banner  onto white cardstock at a 400% scale and glued the pieces together.

Twinkle Twinkle You're a STAR! classroom theme | classroom library | classroom tour | classroom decor | classroom setup | rainbow classroom theme | back to school | Kinder Craze blog

I wanted to add a pop of color help create a focal point, so I cut the Vertical Rainbow Stripes border into narrow strips and glued those to the edges of the banner. Adding a final layer of black scalloped border gave it just the right contrast to make it pop from the beige cabinet and a few star cutouts created the perfect finishing touch!

Twinkle Twinkle You're a STAR! classroom theme | classroom tour | classroom decor | classroom setup | rainbow classroom theme | back to school | Kinder Craze blog

We placed a few fun seats on each side of the banner. Another teacher at the school had just finished packing up her classroom for an out-of-state move and she left two teal cube seats behind. They were a little beat up and had seen better days, but they matched and were FREE so we grabbed them for Amy's classroom. I topped each seat with a rainbow pillow that couldn't have been a better match for the Twinkle Twinkle decor. I purchased the pillows from IKEA several years ago and used them in my Rainbow Chalkboard classroom. They've been sitting in my basement ever since I changed themes and I was so happy to bring them out and put them to good use! The best part: I found very similar pillows and black cube storage seats online for anyone who wants to recreate this look in their own classroom.

Twinkle Twinkle You're a STAR! classroom theme | classroom library | flexible seating | alternative seating | classroom tour | classroom decor | classroom setup | rainbow classroom theme | back to school | Kinder Craze blog

Twinkle Twinkle You're a STAR! classroom theme | classroom library | flexible seating | alternative seating | classroom tour | classroom decor | classroom setup | rainbow classroom theme | back to school | Kinder Craze blog


Learning Space For Older Students

Young children are the only students who come to the learning center. My school goes all the way up to 8th Grade and many middle school students also spent time in the Learning Center throughout the day. Amy has simple rows of large desks for those students to work in a more structured setting.

Twinkle Twinkle You're a STAR! classroom theme | classroom library | flexible seating | alternative seating | classroom tour | classroom decor | classroom setup | rainbow classroom theme | back to school | Kinder Craze blog

This part of the room didn't need as many bright colors or decor so we kept things simple and trimmed the whiteboard with black scalloped and Rainbow Big Dots straight border. The younger students occassionally work in this part of the classroom so we placed a simple black and white alphabet from the Schoolgirl Style Industrial Chic decor above the whiteboard.

Twinkle Twinkle You're a STAR! classroom theme | classroom tour | classroom decor | classroom setup | rainbow classroom theme | back to school | Kinder Craze blog

This area of the room may be simple, but it's perfect for the older students (or even younger students who especially need a break from the bright colors.)

Twinkle Twinkle You're a STAR! classroom theme | classroom library | flexible seating | alternative seating | classroom tour | classroom decor | classroom setup | rainbow classroom theme | back to school | Kinder Craze blog

Some people might be wondering if this classroom design is a little too “babyish” for the older students, but I can tell you, they love spending time in a beautiful room that their teacher took time to decorate. My kindergarten students have seventh grade buddies and the seventh graders always gush over how much they love spending time in my classroom. I'm certain that students of all ages will love spending time inside of Mrs. Perna's classroom.


Teacher Desk Corner

Every teacher needs an area of the classroom that can be used for planning and prep. Mrs. Perna's desk sat perfectly in an otherwise awkward corner of the classroom. We decorated a nearby bulletin board with a coordinating calendar set from the Twinkle Twinkle decor line. On the adjacent bulletin board, I printed another digital banner at a scale of 400%, attached the pieces, and trimmed it with border to match the rest of the classroom. We placed a blue chair that Amy already owned in front of the boards and popped another rainbow pillow in the chair (similar here) along with a cute math themed throw pillow that was already in the room.

Twinkle Twinkle You're a STAR! classroom theme | classroom library | flexible seating | alternative seating | classroom tour | classroom decor | classroom setup | rainbow classroom theme | back to school | Kinder Craze blog

We also added a pop of color to Amy's teacher desk by covering the front of it with chalkboard Fadeless paper, Rainbow Big Dots border and more star cutouts. What teacher wouldn't want to work in this cozy little corner? It's the perfect last stop on our little classroom tour.

Twinkle Twinkle You're a STAR! classroom theme | teacher desk | classroom tour | classroom decor | classroom setup | rainbow classroom theme | back to school | Kinder Craze blog

Shopping Inspiration

If you fell in love with this collection and are ready to shop, I made it super-simple for you and created a graphic of all my favorite pieces from the Twinkle Twinkle You're a STAR! collection from Carson-Dellosa and Schoolgirl Style. See the list below for easy shopping links!

Twinkle Twinkle You're a STAR! classroom theme | classroom library | flexible seating | alternative seating | classroom tour | classroom decor | classroom setup | rainbow classroom theme | back to school | Kinder Craze blog
1. Rainbow Big Dots straight border |  2. Welcome bulletin board set |  3. Follow Your Dreams bulletin board set | 4. A Star is Born printable chart | 5. Dream Big Little One printable chart | 6. Twinkle Twinkle You're a STAR! calendar bulletin board set | 7. Colors Star cut-outs | 8. White with Polka Dots straight borders | 9. Black with Polka Dots straight borders | 10. Pink with Polka Dots straight borders | 11. Twinkle Twinkle You're a Star! Dream Big printable pennants | 12. Believe chart | 13. Shine Bright chart | 14. Dream Big chart | 15. Stars and the Future Belongs chart | 16. Twinkle Twinkle chart | 17. Vertical Rainbow Stripes straight borders

Classroom Furnishings


Decorating on a Budget

If there is one thing I have learned from this experience, it is that one teacher's trash is another teacher's treasure! As educators we tend to hold on to so many things just in case we need them one day and we keep using items that don't match because they are functional. If you find yourself with great quality items in your classroom that just don't match, keep your eyes open around your school. Chances are, there's a colleague who owns something that would be perfect for your classroom that you just need to barter with! Mrs. Perna capitalized on some seriously perfect pieces – like rainbow pillows, Really Good Stuff book bins, and cube seats that were no longer in use and was able to trade her unwanted old blue bins for someone who will treasure them. I've borrowed and traded many times over the years for my own classroom and it's always win-win!

Twinkle Twinkle You're a STAR! classroom theme | classroom library | flexible seating | alternative seating | classroom tour | classroom decor | classroom setup | rainbow classroom theme | back to school | Kinder Craze blog

Twinkle Twinkle You're a STAR Bulletin Board Set Giveaway

I am so excited to share a little magic of the Twinkle Twinkle You're a STAR classroom decor line with one lucky Kinder Craze reader. Carson-Dellosa is generously giving away two great items to help transform your classroom. Use the rafflecopter below for your chance to win a birthday bulletin board set and a Follow Your Dreams bulletin board set!

a Rafflecopter giveaway

I wish you all the best as you prepare to set up and head back into your own classroom this summer!

The post Twinkle Twinkle You’re A Star! Classroom Design</br> with Schoolgirl Style & Carson-Dellosa appeared first on Kinder Craze.

First Grade Classroom Makeover: Come Take a Tour!

$
0
0

I have mentioned on several occasions that one of the great joys that this blog and selling resources on Teachers Pay Teachers have brought into my life is the ability to share my passion with other educators. That usually means sharing resources, ideas, and inspiration on the blog, Facebook and Instagram. But sometimes, I get to help in a more tangible way – like transforming a classroom. A few weeks ago I blogged about a classroom makeover that I helped complete in conjunction with Carson-Dellosa. Today, I'm overjoyed to take you on a tour of a first grade classroom transformation in my school. Before I dive in too deep, I should explain that this was a makeover I helped created two years ago. I had every intention of blogging about the transformation right after it was completed in August 2016, but life got busy (as it often does) and I didn't even have a chance to take photos. After an entire school year of admiring this room every time I walked by, I finally grabbed my camera in May 2017 and captured it all to share with you. Better late than never, right?

I know how much a classroom transformation inspires you to create change in your own classroom. To make the process a little easier, I included shopping links throughout this blog post, including affiliate links. I earn a small commission each time someone makes  a purchase through one of my links (at no additional cost to you), which helps to support the blog so I can keep sharing this kind of content with you. I hope you love today's first grade tour!

First Grade classroom tour | classroom before and after | classroom makeover | classroom decor | classroom decorations | Kinder Craze blog

First Grade Classroom Before Photos

I'm going to start by saying that there was absolutely nothing wrong with this first grade classroom before we changed it. Mrs. Kim Lusch ran a smooth, orderly classroom that was bright, cheery and filled with love and everyone who entered into the room wanted to linger as long as possible. Here is how her classroom looked before the transformation.

First Grade classroom tour | classroom before and after | classroom makeover | classroom decor | classroom decorations | Kinder Craze blogFirst Grade classroom tour | classroom before and after | classroom makeover | classroom decor | classroom decorations | Kinder Craze blogFirst Grade classroom tour | classroom before and after | classroom makeover | classroom decor | classroom decorations | Kinder Craze blogFirst Grade classroom tour | classroom before and after | classroom makeover | classroom decor | classroom decorations | Kinder Craze blog First Grade classroom tour | classroom before and after | classroom makeover | classroom decor | classroom decorations | Kinder Craze blogFirst Grade classroom tour | classroom before and after | classroom makeover | classroom decor | classroom decorations | Kinder Craze blog First Grade classroom tour | classroom before and after | classroom makeover | classroom decor | classroom decorations | Kinder Craze blog First Grade classroom tour | classroom before and after | classroom makeover | classroom decor | classroom decorations | Kinder Craze blogFirst Grade classroom tour | classroom before and after | classroom makeover | classroom decor | classroom decorations | Kinder Craze blogFirst Grade classroom tour | classroom before and after | classroom makeover | classroom decor | classroom decorations | Kinder Craze blog

Like so many other teachers, Kim had decorated her classroom piece by piece over the years. Little by little a great bargain rug, garage sale find, or pre-loved decor item made its way into her classroom – which introduced a wide array of colors over time. Purple, yellow, orange, teal, lime, magenta, coral, gray, dark blue – just about every color of the rainbow appeared in some form. One day Kim looked around her room and wanted a more cohesive color scheme with a deliberate classroom design. We were chatting about her classroom and I jumped at the chance to help her give the room a refresh.


Kim's New First Grade Classroom

We spent a few weeks deciding on a theme and color scheme, then dove right it! It took a few weeks, but we completely redesigned Kim's first grade classroom into a space she absolutely loved.

We started by nailing down a color scheme. Kim already owned several pink, teal, and lime green classroom accents; which she absolutely loved. She also wanted to go a little bolder and incorporate black into her room to make those bright colors pop. Once we decided on a color scheme, we looked for printable decor to fit her style … and fell in love with the Tickle Me Pink Paisley decor collection from Schoolgirl Style. We drew our inspiration from this photo. Stunning, right?

First Grade classroom tour | Schoolgirl Style decor | Tickle Me Pink Paisley theme | classroom before and after | classroom makeover | classroom decor | classroom decorations | Kinder Craze blog

Once we had a color scheme, a theme, and plenty of inspiration courtesy of Schoolgirl Style, it was time to get to work! We immediately started a major classroom cleanup and decluttering purge. Kim sorted through the collection of items that had accumulated in her classroom over the past ten years and sold all of her decor that didn't match the new color scheme on a local teacher swap Facebook page. Not only did she get rid of her unwanted things, but she had a few extra dollars in her pocket.

Then the real fun began! I am so excited to take you on a tour of Kim's updated first grade classroom!

First Grade classroom tour | Schoolgirl Style decor | Tickle Me Pink Paisley theme | classroom before and after | classroom makeover | classroom decor | classroom decorations | Kinder Craze blog

Right away you can't help but notice a few distinct changes. Gone was the accidental rainbow of classroom decor. All of Kim's updated classroom accessories fit the cohesive color scheme of pink, lime, teal, and black. We also rearranged the furniture to create a more open learning area. The previous layout had a library nook in front of the bank of windows. The nook was cute, but it created a barrier in the classroom which made the room feel smaller and also made it difficult to see what was happening in the library.

We moved the library to the back wall of the room, which opened the space and helped Kim to easily have all the students within her line of sight throughout the day. I can't wait to tell you more about the library, but I'll hold off to show you a few more views of the classroom.

First Grade classroom tour | Schoolgirl Style decor | Tickle Me Pink Paisley theme | classroom before and after | classroom makeover | classroom decor | classroom decorations | Kinder Craze blog


Classroom Window Display

The space above the windows always provides a challenge at my school. It's awkward and difficult to climb up and and decorate – and they aren't bulletin boards. Those spaces are high-gloss white boards (not whiteboards … just boards that are white and glossy). I've learned over time that the best trick is to cover them with paper and border like a bulletin board (using a heck of a lot of packing tape), decorate them once and then never touch them again for the rest of the year. Kim's students created self-portraits, which she she mounted on black paper and displayed on the boards above the windows. I thought this was such a sweet way to enhance her classroom community.

First Grade classroom tour | Schoolgirl Style decor | Tickle Me Pink Paisley theme | classroom before and after | classroom makeover | classroom decor | classroom decorations | Kinder Craze blog


First Grade Teacher Desk Area

We also moved Kim's teacher area to a different corner on the other side of the classroom, but that wasn't the only change. Kim simplified the space by saying goodbye to her bulky desk unit. Instead, she purchased two sets of stacked drawers from Walmart to hold a variety of teaching supplies. We tucked the drawer units beside her file cabinet behind the guided reading table and it created the perfect clutter-free way to have everything she needed right at her fingertips. It was also a great surface to display family photos and mementos.

First Grade classroom tour | Schoolgirl Style decor | Tickle Me Pink Paisley theme | classroom before and after | classroom makeover | classroom decor | classroom decorations | Kinder Craze blog

First Grade classroom tour | Schoolgirl Style decor | Tickle Me Pink Paisley theme | classroom before and after | classroom makeover | classroom decor | classroom decorations | Kinder Craze blog

The file cabinets and bins for Kim's instructional materials were all labeled using the coordinating tags in the Tickle Me Pink Paisley decor pack from Schoolgirl Style.

First Grade classroom tour | Schoolgirl Style decor | Tickle Me Pink Paisley theme | classroom before and after | classroom makeover | classroom decor | classroom decorations | Kinder Craze blog

First Grade classroom tour | Schoolgirl Style decor | Tickle Me Pink Paisley theme | classroom before and after | classroom makeover | classroom decor | classroom decorations | Kinder Craze blog

First Grade classroom tour | Schoolgirl Style decor | Tickle Me Pink Paisley theme | classroom before and after | classroom makeover | classroom decor | classroom decorations | Kinder Craze blog

Kim's workspace looked great from across the room and she didn't miss the bulky desk at all.

First Grade classroom tour | Schoolgirl Style decor | Tickle Me Pink Paisley theme | classroom before and after | classroom makeover | classroom decor | classroom decorations | Kinder Craze blog


Math Manipulative Storage

On the other side of the Smartboard, you can see a white shelf with several white storage boxes on it. This is where Kim stored all of her math manipulatives. We kept things cohesive and organized with the help of my Black Series Visual Supply Labels.

First Grade classroom tour | Schoolgirl Style decor | Tickle Me Pink Paisley theme | classroom before and after | classroom makeover | classroom decor | classroom decorations | Kinder Craze blog


First Grade Word Wall

Kim used the fronts of her built-in over head cabinets to display her classroom word wall. The round Alphabet Cards are included in the Schoolgirl Style Tickle-Me-Pink Paisley decor pack.

First Grade classroom tour | Schoolgirl Style decor | Tickle Me Pink Paisley theme | classroom before and after | classroom makeover | classroom decor | classroom decorations | Kinder Craze blog


First Grade Classroom Library

My favorite area of any classroom is the library and Kim's First Grade classroom library did not disappoint!

First Grade classroom tour | Schoolgirl Style decor | Tickle Me Pink Paisley theme | classroom before and after | classroom makeover | classroom decor | classroom decorations | Kinder Craze blog

Kim has a passion for reading and she owns more books than any other teacher I have ever met. We organized all of Kim's leveled books in patterned pink and lime bins from Really Good Stuff (you can get them here from Amazon!) across the top shelf of her library. The bottom two rows hold blue and black magazine bins from Big Lots. The blue boxes hold a variety of themed and seasonal books for Kim's students to easily access. All of the bins were labeled with the White Series Classroom Library Label set from my TpT store. We created labels for all of Kim's favorite book character and author sets using the editable files in the pack.

First Grade classroom tour | Schoolgirl Style decor | Tickle Me Pink Paisley theme | classroom before and after | classroom makeover | classroom decor | classroom decorations | Kinder Craze blog

The shelves were purchased from Amazon and I think the row of five identical bookshelves really helps to anchor the space and created a perfect focal point.

First Grade classroom tour | Schoolgirl Style decor | Tickle Me Pink Paisley theme | classroom before and after | classroom makeover | classroom decor | classroom decorations | Kinder Craze blog

The giant black and white rug helped tremendously to define this area of her classroom and also served as a place for Kim's students to gather during calendar time, read alouds, and classroom discussions. This particular rug is currently out of stock but I found a few similar rugs online. Click any of the rugs in the image below to start shopping!

Of course, every library needs a cozy place to read. We laid a 5-cube storage shelf from Walmart on it's side to create an easy, sturdy reading bench. The long pink cushion was a hand-me-down from my previous Rainbow Chalkboard classroom and was a perfect match for this decor. Kim already owned all of the accent pillows, which helped soften the space. The black cube bins inside bench were filled to the brim with even more books for Kim to share with her students.

First Grade classroom tour | Schoolgirl Style decor | Tickle Me Pink Paisley theme | classroom before and after | classroom makeover | classroom decor | classroom decorations | Kinder Craze blog

Tucked away behind Kim's easel is a tall shelf with games for indoor recess and some chapter books for her advanced readers. Kim also used this area to create a comfy reading nook – one that she could easily see from any area of the room.

First Grade classroom tour | Schoolgirl Style decor | Tickle Me Pink Paisley theme | classroom before and after | classroom makeover | classroom decor | classroom decorations | Kinder Craze blog First Grade classroom tour | Schoolgirl Style decor | Tickle Me Pink Paisley theme | classroom before and after | classroom makeover | classroom decor | classroom decorations | Kinder Craze blog

This whole space is perfect for gathering, reading, and learning. I adore how it all came together.

First Grade classroom tour | Schoolgirl Style decor | Tickle Me Pink Paisley theme | classroom before and after | classroom makeover | classroom decor | classroom decorations | Kinder Craze blog

Remember how I mentioned that Kim owns more library books than any other teacher I know? Well, there are so many books that the library could only contain about 2/3 of the collection. The rest of the books are actually kept under the window.

First Grade classroom tour | Schoolgirl Style decor | Tickle Me Pink Paisley theme | classroom before and after | classroom makeover | classroom decor | classroom decorations | Kinder Craze blog

Kim owns so many books that in a few different themes that they couldn't fit in a narrow book box. We stored the larger themes in her collection in heavy duty Sterilite bins that she already owned and tucked the books away in her classroom's built-in shelving along with a selection of additional pink and lime bins that couldn't fit in the main library. Her students' book boxes were numbered and lined neatly up across the top of the shelf.

First Grade classroom tour | Schoolgirl Style decor | Tickle Me Pink Paisley theme | classroom before and after | classroom makeover | classroom decor | classroom decorations | Kinder Craze blog

We may have separated Kim's library books into two different areas of the classroom, but the separation was seamless and cohesive thanks to my Classroom Library Labels. Every single library bin clearly displayed the same label style to pull everything together. All of Kim's books are tagged with coordinating stickers on each book so her students will easily know exactly where to return books after they are finished reading them.

The library labels helped keep Kim's classroom organized and running smoothly while looking clean and clutter-free.

First Grade classroom tour | Schoolgirl Style decor | Tickle Me Pink Paisley theme | classroom before and after | classroom makeover | classroom decor | classroom decorations | Kinder Craze blog

And there you have it! I sincerely hope that you enjoyed today's tour as much as I enjoyed sharing it with you. I just wish that I had shared it with you sooner. Mrs. Lusch recently said goodbye to this wonderful school and classroom when she moved out of state with her family a few weeks ago.

Kim, I wish you all the best and I know your new classroom will be filled to the brim with love – just like this one was!

First Grade classroom tour | Schoolgirl Style decor | Tickle Me Pink Paisley theme | classroom before and after | classroom makeover | classroom decor | classroom decorations | Kinder Craze blog


Recreate this First Grade Classroom

If you would like to recreate a little of the magic from Kim's classroom in your own teaching space, I compiled a little shopping guide to help you get started. Click any of the images below to start filling your cart!


The post First Grade Classroom Makeover:</br> Come Take a Tour! appeared first on Kinder Craze.

A Different Kind of First Day of School

$
0
0

Tomorrow is the first day of school and for the first time in as long as I can remember, I am not preparing for a day in the classroom. There are no new school supplies, no new clothes to lay out, no lunch to make. There won't be any tossing and turning in my sleep tonight because of first-day jitters, I won't strain my voice from explaining so many classroom procedures that even I get tired of hearing myself talk, and there won't be any of those extra sweet first-day hugs from a brand new batch of kindergarteners. Instead, I will be at home, playing with my daughter, squeezing in a little work from home, and enjoying life outside of the classroom. I made the decision to take a year off from teaching so I can spend more time with my family.

Maria Gavin from Kinder Craze | A different kind of first day of school | Kinder Craze: A Kindergarten Teaching Blog

I must admit that it all feels a bit strange. For as long as I can remember, there has always been a first day of school. First as a student, then as a teacher. The end of summer and arrival of fall always meant the same thing – it was time to go back to school. This year things are very different and while it is scary and strange, the future also is also full of promise and possibility. This is a break that my heart and soul have been seeking.

Why did I decide to take a break?

This past year was incredibly difficult to juggle all of the things that I love, despite my very best efforts. I have known for quite some time that the only way I could continue to teach, blog, and have enough time for my family was to gradually cut down on my school commitments. For the past few years I have been working part time and trying everything I could think of to make all the pieces fit together. My principal did a wonderful job of trying to accommodate my schedule and I did anything and everything I could to try and fit all of my passions into what became a very busy schedule.

But becoming a mother really does change everything. This past year I felt my priorities shift and I began to crave calm and simplicity more than anything – in addition to wanting to soak up every possible moment with my daughter while she is still young.

I desperately tried to juggle my hats of mother, teacher, wife, blogger, sister, friend and daughter to the best of my abilities; while also making a point not to sacrifice my own health and well-being. Every day last year, I set my alarm to wake me up at 4am so that I could have time to pray, dress, work on the blogs, and get ready for the day before waking Dessa up and heading out the door to arrive at school by 7:15. It was exhausting, but I somehow made it work.

I've never been one to do anything halfway and the problem was that my part-time teaching job started to feel a lot like a full time job. There were countless days that I found myself at school hours past my out-the-door-for-the-day goal of 12:30pm. I struggled to pull myself away for the day knowing that there were still parents and students counting on me and tasks that required my attention.

As school ate up more and more of my time, I was determined not to deprive Dessa or my husband, Rob, of the mother and wife they deserved. So the time that remained in my day was spent enjoying every possible moment with Dessa until she went to bed. Once she was down, Rob and I caught up on our day and watched a quick show together before I hauled my exhausted self off bed around 9:15pm so I could wake up the next day and do it all over again.

It was a lot to juggle and I felt like I was spreading my limited time and energy into too many passions. Something had to give. Last year, Kinder Craze suffered because there just wasn't enough of me to go around. Sometimes months would go by before I had a chance to write a new blog post or share a photo on Instagram. I was exhausted and at the end of the day and didn't have the energy to keep up.

Am I leaving school forever? Of course not.

Although I may not be in the classroom every day, I have no intention of disappearing from school and I will still refer to it as “my school.” St. Mary School will always and forever hold a very special place in my heart, even if I'm not there teaching in the traditional sense. My principal refers to my break from teaching as a “sabbatical” and I think that's the most appropriate term for this season of my life.

I actually spent more time at school this summer than you would expect from a educator taking a break from the classroom. I helped three different teachers redecorate their classrooms for the new school year. I already shared a tour of my school's Learning Center makeover that featured the new Twinkle Twinkle You're A STAR collection from Carson-Dellosa and Schoolgirl Style. I also redecorated my mom's old second grade classroom in a nautical theme (which is the cutest classroom ever and I am so excited to share the transformation with you in a couple of weeks). Lastly, and perhaps the most bittersweet of all, I've been working with my good friend Lexy, who is taking over my kindergarten teaching position to completely reimagine her classroom space. It has been a very busy, somewhat crazy, mostly magical summer. I even had the distinct challenge of trying to work at school with my 13-month old daughter in tow on several occasions. (Just as much as I will always view myself as a teacher, she will always and forever be a teacher's daughter.)

Something amazing happened as I hauled in a mountain of supplies, decor and bins for my classroom projects this summer. Without the stress of a new school year and the return of a crazy schedule that left my head spinning, I was able to focus on the classroom environment and just enjoy my work. It was like a breath of fresh air. The joy of my work returned and I had an extra spring in my step as I rediscovered a passion I had put on pause for far too long.

I'm not quite sure what this next year has in store for me or my family and I've been asked about my future as a teacher more often than I can count. My plan is to see how this year goes and see where God leads me. I may find after one year that I miss the classroom more than anything and I want to try juggling all of my roles once again. I may wait until my daughter is in school to return to the classroom. Or perhaps this year will open up new opportunities to share my knowledge and expertise with more teachers than ever before – in a different kind of learning space. I truly don't know what the future holds – I'm just following my heart and trusting that this is the best choice for right now.

So what happens now?

Well, I have big plans to celebrate the first day of school by taking my daughter for a walk to our local library. I'm also excited to share my remaining classroom transformation projects in the blog in the coming weeks and if all goes well, I will finally be able to share some amazing content and ideas that I photographed over the past few years but could never quite find the time to share with you on Kinder Craze. (So, so many great ideas.)

But I don't want to get too ahead of myself.

First off, this teacher-mama desperately needs a vacation. It has been nearly two years since our family treated ourselves to a proper getaway. The three of us are heading up to Mackinac Island in a few weeks for two glorious nights away from all of the hustle and bustle of our busy lives. We intend to ride bikes, hike, play on the lawn, take in the scenery and just enjoy ourselves.

I'm not going anywhere. 

I am so incredibly thankful for each and every one of you that have been following my journey for the past six years. I may be stepping out of the classroom, but I have no intention of going anywhere. You can  continue to follow along with my latest projects by following Kinder Craze on Facebook and Instagram. And if you want to see more of my life at home, read all about life with Dessa, find out how we live on a budget, you can follow all of the Gavin family happenings our lifestyle blog, Crazy Together.

I'm wishing all of you an incredible school year that is filled with every bit of joy that you and your students deserve. If you need me, I'll be over here with this crazy girl, hoping to answer your questions, emails and comments much more quickly.

The post A Different Kind of First Day of School appeared first on Kinder Craze.


Celebrate the Gospel this Advent with a Box from HelloBible

$
0
0

The Christmas season is upon us and I truly feel as though there is magic in the air. As excitingly wonderful as Christmas trees, Santa and the colorful lights can be, I especially love the quiet, peaceful moments of Advent. Young children are drawn to the story of Mary, Joseph, and Baby Jesus in the stable and the Advent season has always been one of my favorite times to celebrate in the classroom. It can be a challenge for parents to find meaningful ways to extend faith formation out of the classroom and into the home, which is why I love HelloBible – the Christian subscription box for children ages 5-10. I recently had the opportunity to preview The Christmas Box from HelloBible with my nephew, which captures the magic of Advent with a book, art projects, and prayer resources; and he was captivated.

Thank you to HelloBible for sponsoring this post. While this was a sponsored opportunity from HelloBible, all content and opinions expressed here are my own and I only support brands and products that I truly love. I sincerely hope you enjoy today's post and discover a meaningful way to share the true meaning of Christmas with the children in your life.

Save $5 on your HelloBible box if when you use the code KINDERCRAZE at checkout! 

Celebrate the Advent season with a HelloBible Christmas box. HelloBible is a Christian subscription box for children ages 5-10. Each box comes with a book, supplies and instructions to complete 2 art projects, and prayer resources | Kinder Craze teaching blog #homeschool #christmas #advent #giftideas #catholicschool #christianeducation

I have been a fan of the HelloBible ever since I had a chance to check out their Noah box last year. Any product that draws children into the Word of God in a fun and engaging way is always a hit with me and HelloBible is no exception. Each monthly box arrives with a book about a featured Bible story, instructions and supplies to create two related crafts, and additional prayer tools to help grow your child's faith life. Past boxes from HelloBible have featured classic stories from the Old Testament, but this Advent HelloBible is launching the first of their new Gospel series – starting with the birth of Jesus Christ. I think the timing is absolutely perfect and was excited to share the fun of HelloBible with my nephew, Connor.

Celebrate the Advent season with a HelloBible Christmas box. HelloBible is a Christian subscription box for children ages 5-10. Each box comes with a book, supplies and instructions to complete 2 art projects, and prayer resources | Kinder Craze teaching blog #homeschool #christmas #advent #giftideas #catholicschool #christianeducation

We started by reading the book “Baby Jesus is Born” and took time to discuss the people and events portrayed in the story. Connor was quickly drawn into the story of our Savior's birth.

Celebrate the Advent season with a HelloBible Christmas box. HelloBible is a Christian subscription box for children ages 5-10. Each box comes with a book, supplies and instructions to complete 2 art projects, and prayer resources | Kinder Craze teaching blog #homeschool #christmas #advent #giftideas #catholicschool #christianeducation

After reading the book, it was time to dig in for some fun crafting. Every HelloBible box comes with instructions and all the materials you need to create two different art projects. Connor had his eye on the little wood cutout ornaments and glitter paints from the moment I first opened the box. Even though it was art project #2 in the set, we just had to start by painting Christmas ornaments.

Celebrate the Advent season with a HelloBible Christmas box. HelloBible is a Christian subscription box for children ages 5-10. Each box comes with a book, supplies and instructions to complete 2 art projects, and prayer resources | Kinder Craze teaching blog #homeschool #christmas #advent #giftideas #catholicschool #christianeducation

We used the special crayon enclosed in the Christmas Box to begin decorating the ornaments. The stacking crayon was such a novelty!

Celebrate the Advent season with a HelloBible Christmas box. HelloBible is a Christian subscription box for children ages 5-10. Each box comes with a book, supplies and instructions to complete 2 art projects, and prayer resources | Kinder Craze teaching blog #homeschool #christmas #advent #giftideas #catholicschool #christianeducation

After the ornaments were colored with crayon, it was time to embellish them with glitter paint. This was without a doubt Connor's favorite part of our time together.

Celebrate the Advent season with a HelloBible Christmas box. HelloBible is a Christian subscription box for children ages 5-10. Each box comes with a book, supplies and instructions to complete 2 art projects, and prayer resources | Kinder Craze teaching blog #homeschool #christmas #advent #giftideas #catholicschool #christianeducationCelebrate the Advent season with a HelloBible Christmas box. HelloBible is a Christian subscription box for children ages 5-10. Each box comes with a book, supplies and instructions to complete 2 art projects, and prayer resources | Kinder Craze teaching blog #homeschool #christmas #advent #giftideas #catholicschool #christianeducation

The HelloBible Christmas box even came with gold and silver ribbon to hang the ornaments. Connor was very happy with his finished masterpieces. 

Celebrate the Advent season with a HelloBible Christmas box. HelloBible is a Christian subscription box for children ages 5-10. Each box comes with a book, supplies and instructions to complete 2 art projects, and prayer resources | Kinder Craze teaching blog #homeschool #christmas #advent #giftideas #catholicschool #christianeducation

Oh my gosh, I just love this sweet boy so much.

Celebrate the Advent season with a HelloBible Christmas box. HelloBible is a Christian subscription box for children ages 5-10. Each box comes with a book, supplies and instructions to complete 2 art projects, and prayer resources | Kinder Craze teaching blog #homeschool #christmas #advent #giftideas #catholicschool #christianeducation

As much as Connor enjoyed decorating his wooden Christmas ornaments, this really wasn't a “just for fun” project. The craft instructions explained that the ornaments were a reminder to “focus on Jesus Christ and keep Him at the center of your Christmas preparations.” Each ornament was a symbol of Jesus and encouraged Connor to reflect and be reminded of Christ throughout the season.

Celebrate the Advent season with a HelloBible Christmas box. HelloBible is a Christian subscription box for children ages 5-10. Each box comes with a book, supplies and instructions to complete 2 art projects, and prayer resources | Kinder Craze teaching blog #homeschool #christmas #advent #giftideas #catholicschool #christianeducationCelebrate the Advent season with a HelloBible Christmas box. HelloBible is a Christian subscription box for children ages 5-10. Each box comes with a book, supplies and instructions to complete 2 art projects, and prayer resources | Kinder Craze teaching blog #homeschool #christmas #advent #giftideas #catholicschool #christianeducation

After reading the story and completing our first art project, it was time to move on to the second project in the HelloBible Christmas box – creating nativity magnets.

Celebrate the Advent season with a HelloBible Christmas box. HelloBible is a Christian subscription box for children ages 5-10. Each box comes with a book, supplies and instructions to complete 2 art projects, and prayer resources | Kinder Craze teaching blog #homeschool #christmas #advent #giftideas #catholicschool #christianeducation

When I was teaching kindergarten, I always loved to give each student a set of nativity stickers to create their own scene. This project had a fun new twist on a classic activity. Connor followed the instructions and placed each sticker onto the piece of felt that came in his HelloBible box.

Celebrate the Advent season with a HelloBible Christmas box. HelloBible is a Christian subscription box for children ages 5-10. Each box comes with a book, supplies and instructions to complete 2 art projects, and prayer resources | Kinder Craze teaching blog #homeschool #christmas #advent #giftideas #catholicschool #christianeducation

Next, we placed the decorated felt onto the sticky side of a self-adhesive magnetic sheet and placed a narrow strip of brown felt at the bottom of the magnet.

Celebrate the Advent season with a HelloBible Christmas box. HelloBible is a Christian subscription box for children ages 5-10. Each box comes with a book, supplies and instructions to complete 2 art projects, and prayer resources | Kinder Craze teaching blog #homeschool #christmas #advent #giftideas #catholicschool #christianeducation

The next step was to carefully cut around each sticker to create nativity magnets. Older children could do step on their own, but I did this part for Connor since the magnet was so thick to cut through. We created a simple stable by following the cutting instructions for the brown felt strip.

The nativity pieces and stable would have been fun enough all on their own, but HelloBible took this project one step further and included a simple magnetic tin in the box. It was the perfect size to create and display a nativity scene – and it had the added bonus of serving as the perfect way to store those magnetic pieces when they were not in use.

Celebrate the Advent season with a HelloBible Christmas box. HelloBible is a Christian subscription box for children ages 5-10. Each box comes with a book, supplies and instructions to complete 2 art projects, and prayer resources | Kinder Craze teaching blog #homeschool #christmas #advent #giftideas #catholicschool #christianeducation

Connor loved playing with the nativity magnets he created.

Celebrate the Advent season with a HelloBible Christmas box. HelloBible is a Christian subscription box for children ages 5-10. Each box comes with a book, supplies and instructions to complete 2 art projects, and prayer resources | Kinder Craze teaching blog #homeschool #christmas #advent #giftideas #catholicschool #christianeducationCelebrate the Advent season with a HelloBible Christmas box. HelloBible is a Christian subscription box for children ages 5-10. Each box comes with a book, supplies and instructions to complete 2 art projects, and prayer resources | Kinder Craze teaching blog #homeschool #christmas #advent #giftideas #catholicschool #christianeducation

All HelloBible boxes come with a sticker that serves as a reminder of the lesson from the shipment. We placed the nativity sticker on Connor's special sticker chart. HelloBible subscription customers can collect a new sticker each time they complete a box and add it to the chart.

Celebrate the Advent season with a HelloBible Christmas box. HelloBible is a Christian subscription box for children ages 5-10. Each box comes with a book, supplies and instructions to complete 2 art projects, and prayer resources | Kinder Craze teaching blog #homeschool #christmas #advent #giftideas #catholicschool #christianeducation

I truly cannot say enough good things about HelloBible. It is a wonderful experience for helping develop the faith life of children ages 5-10 and each box is engaging and fun. I am always looking to bless my daughter, niece and nephews with non-toy gifts and HelloBible is the PERFECT alternative. Especially because a new box will arrive at their door long after Christmas has passed and the heaps of toys are cast aside. 

Celebrate the Advent season with a HelloBible Christmas box. HelloBible is a Christian subscription box for children ages 5-10. Each box comes with a book, supplies and instructions to complete 2 art projects, and prayer resources | Kinder Craze teaching blog #homeschool #christmas #advent #giftideas #catholicschool #christianeducation

If you would like to purchase HelloBible for your child or a loved one, now is a great time! Save $5 on your order when you use code KINDERCRAZE at checkout. And if siblings are on your holiday shopping list, HelloBible makes it especially easy. All HelloBible boxes can be customized to include project supplies for up to four children.

Celebrate the Advent season with a HelloBible Christmas box. HelloBible is a Christian subscription box for children ages 5-10. Each box comes with a book, supplies and instructions to complete 2 art projects, and prayer resources | Kinder Craze teaching blog #homeschool #christmas #advent #giftideas #catholicschool #christianeducation

Wishing you and your family a joyful and blessed Advent and Christmas season!

The post Celebrate the Gospel this Advent</br> with a Box from HelloBible appeared first on Kinder Craze.

Second Grade Nautical Theme Classroom Makeover

$
0
0

I may have stepped out of the classroom this year to be at home with my daughter, but I still can't resist a good classroom makeover. This past summer, I transformed my friend's second grade classroom into a nautical … wonderland? I honestly don't know what I should call this oceanic oasis. Regardless, I poured my heart and soul into every detail of this classroom for my sweet friend and I am so excited to take you on a tour of the space – and just wait till you see the cute little reading tent I set up in her classroom library!

This post contains affiliate links. I earn a small commission each time someone makes a purchase through one of my links, which helps to support the blog. Special thanks to Teepee Joy for contributing the adorable reading tent for Mrs. B's nautical classroom makeover.

Mrs. B's completed nautical classroom makeover is so good, I can't wait to show you everything! I'll start with a quick view of the room from the hall so you can take in alllll of the sweet little details and then give you an up-close look at each area.

Second Grade Nautical Theme Classroom Makeover | classroom design | classroom decor | Kinder Craze blog #backtoschool #classroom #classroomdecor

I purchased all of the red, white and blue hanging fans from Party City this summer. They had lots of great patriotic and nautical accessories that played right into Mrs. B's color scheme, but the paper fans were my favorite accessories. I love how the hanging fans immediately draw in the eye and invite you to come into the classroom. The funny thing was that I had “finished” this classroom without the fans and spent a few hours photographing it. Later on, when I looked at the original photos on my computer, the space didn't feel complete. In fact, it felt a little empty – despite the pristine bulletin boards, cozy library, coordinating alternative seating and printable accessories. I made a desperate run to Party City, bought a few packs of fans, hung them from the ceiling and it made all of the difference in the world. Sometimes it's the simplest thing that truly transforms a classroom.

Second Grade Nautical Theme Classroom Makeover featuring printable decor from Schoolgirl Style | classroom design | classroom decor | Kinder Craze blog #backtoschool #classroom #classroomdecor

I love the bold stripes from paper fans that hang above each row, and they came with anchor graphics, but I wanted to make an extra bold statement. I had used several items from the Preppy Nautical Nautical Classroom printable collection from Schoolgirl Style throughout the classroom and the graphics included in the set were a perfect fit for this classroom. I printed a few large red circles and whale cutouts, then glued the whales onto the red circles and placed the completed circles onto each striped lantern with packaging tape. It was just the bold pop I was looking for!

Second Grade Nautical Theme Classroom Makeover featuring printable decor from Schoolgirl Style | classroom design | classroom decor | Kinder Craze blog #backtoschool #classroom #classroomdecor

Many of the classrooms in my former school have a red accent wall and Mrs. B's classroom was no exception. You may remember how I unexpectedly paired bright teal and rainbow accents into the school's learning center when I transformed that space with the Twinkle Twinkle You're a Star collection from Schoolgirl Style and Carson-Dellosa. This time around, the wall was a natural fit for a very classic theme and color scheme. (You don't always have to reinvent the wheel to make a less-than-desirable classroom feature work!)

Second Grade Nautical Theme Classroom Makeover featuring printable decor from Schoolgirl Style | classroom design | classroom decor | Kinder Craze blog #backtoschool #classroom #classroomdecor #catholicschool

The Preppy Nautical classroom collection from Schoolgirl Style also included the cutest naval pennant flags. I printed dozens of nautical flags in a variety of prints, strung them onto 1″ white ribbon, and swagged them as bunting across the front of the classroom. They were a perfect, simple way to add a little pop to an otherwise bare area in the classroom.

Second Grade Nautical Theme Classroom Makeover featuring printable decor from Schoolgirl Style | classroom design | classroom decor | Kinder Craze blog #backtoschool #classroom #classroomdecor #catholicschoolSecond Grade Nautical Theme Classroom Makeover featuring printable decor from Schoolgirl Style | classroom design | classroom decor | Kinder Craze blog #backtoschool #classroom #classroomdecor #catholicschool

One of my favorite views of the classroom is one that visitors see after they walk into the room. it's a straight visual shot from the classroom door over to the windows. You can see some of Mrs. B's manuals and instructional resources tucked into the shelf under the windows, the American flag hangs gracefully in the corner, and there's a little bench for Mrs. B or her students to use during the day. The bench itself was a gift for Mrs. B. from last year's class. It had three cubbies and I found the cutest striped canvas bags at The Container Store that fit perfectly in the cubbies – another fun little pop in her nautical theme classroom makeover.

Second Grade Nautical Theme Classroom Makeover featuring printable decor from Schoolgirl Style | classroom design | classroom decor | Kinder Craze blog #backtoschool #classroom #classroomdecor #catholicschool

When I first started decorating this classroom, I knew right away that I wanted crisp white bulletin boards that were trimmed with bold layered borders. The simple bulletin boards created a perfect backdrop for instructional decor and/or anchor charts, but I wanted to really make the space above the classroom windows pop. The boards are too high up and awkward to easily use for instructional purposes, so I created portholes to hang on those boards.

The portholes themselves were very simple to create. I simply cut large circles from gold poster board and glued 12″ circles that I had cut from a roll of watercolor paper that I found at Michaels. I hot glued large gold sequins around the edges of the gold circle and couldn't believe how realistic they turned out. It truly felt like we were on a ship in the middle of the ocean.

Nautical Bulletin Boards to Fit the Theme

This classroom had one single massive bulletin board that spanned across the back of the room. I covered the board with a roll of white fadeless paper to give it a bright, clean backdrop and layered the same bright red polka dot border (also from Schoolgirl Style and Carson-Dellosa) with solid navy blue scalloped border. I used the layered borders to create two sections of the expansive bulletin board: a large area was designated for CAFE and Daily 5 resources and a smaller area displayed the classroom calendar. Mrs. B. already owned the large navy blue anchor and it looked perfect in the corner of the bulletin board.

Classroom Library in Second Grade Nautical Theme Classroom Makeover | classroom design | classroom decor | Kinder Craze blog #backtoschool #classroom #classroomdecor #classroomlibrary #catholicschool

I picked up the pocket chart in Target's Dollar Spot this summer and created simple calendar numbers to coordinate with the nautical decor. The monthly header at the top is from the Preppy Nautical printable classroom collection by Schoolgirl Style. The cute little “First Day of School” tag is from my Through the Year calendar holiday card set on TpT. The calendar numbers and days of the week labels are available in a free download. Scroll all the way to the bottom of this post to grab the nautical theme mini bundle.

Classroom Calendar in Second Grade Nautical Theme Classroom Makeover | classroom design | classroom decor | Kinder Craze blog #backtoschool #classroom #classroomdecor #classroomlibrary #catholicschool

I found the cutest letter cutouts that resemble weathered wood and they were the perfect accent for this second grade nautical theme classroom. I used them for “Calendar” and “Daily Five” labels and love how they helped to complete the bulletin board. I used simple templates to create the Cafe and Daily Five organizational signs. You can use these simple templates for a variety of classroom instructional/decor items. Scroll all the way to the bottom of the post to get these templates for free!

CAFE and Daily Five signs in Second Grade Nautical Theme Classroom Makeover | classroom design | classroom decor | Kinder Craze blog #backtoschool #classroom #classroomdecor #classroomlibrary #catholicschool #dailyfive #cafe

Nautical Theme Classroom Library

By now it's no secret that I love a good classroom library. Mrs. B. owned so many great just-right books for her second grade students (many of which were already leveled and sorted into categories.) They just needed a little organizational upgrade. The best way to give any classroom library an instant facelift is simply to place all of the books in consistent, coordinating bins. I traded all of Mrs. B's rainbow-colored bins for dark blue ones that were in the school's Learning Center. (It was a perfect trade because neon looked very out of place in this nautical classroom but coordinated perfectly with the Twinkle Twinkle You're a STAR collection that we used to transform that space.)

Classroom Library, CAFE and Daily Five signs in Second Grade Nautical Theme Classroom Makeover | classroom design | classroom decor | Kinder Craze blog #backtoschool #classroom #classroomdecor #classroomlibrary #catholicschool #dailyfive #cafe

Similar blue bins are sold at Lakeshore and Amazon. The white dot bins are from Big Lots (they sell this style of boxes in 4 different colors each summer. Right now Big Lots still has the white bins in stock online so order quickly if you want them for your classroom because they will sell out eventually and next summer's colors could be completely different.) The red metallic bins were a seasonal purchase from Hobby Lobby last summer.

Once I had the box arrangement nailed, it was time to fill the empty bins with books and label everything. That part was SUPER simple, thanks to the White Series Classroom Library Labels in my TpT store. The set includes bin labels in dozens of themes and two different sizes for easy organization, along with coordinating sticker labels for books so that students always know exactly where to return books when they are done reading.

classroom library labels in Second Grade Nautical Theme Classroom Makeover | classroom design | classroom decor | Kinder Craze blog #backtoschool #classroom #classroomdecor #classroomlibrary #catholicschool #dailyfive #cafe

I used many of the pre-made theme labels for Mrs. B's classroom library and put the editable files included in the set to use by creating character and author labels. I can't include these images in the pre-made files for copyright reasons, but it's really easy to make your own using the editable PowerPoint files included in the pack.

classroom library labels in Second Grade Nautical Theme Classroom Makeover | classroom design | classroom decor | Kinder Craze blog #backtoschool #classroom #classroomdecor #classroomlibrary #catholicschool #dailyfive #cafe

I also created custom Guided Reading level labels for this particular library. I wanted these labels to have a more nautical feel to them, so I created my own with the editable template using the Georgia font in bold and made all of the letters red to coordinate with the classroom. It turned out so perfect and gave Mrs. B's classroom library that special something that it needed.

I also attached navy blue and white striped border to the top of the library bookshelf to incorporate an extra touch of decor. It was a small detail that made a big difference.

classroom library labels in Second Grade Nautical Theme Classroom Makeover | classroom design | classroom decor | Kinder Craze blog #backtoschool #classroom #classroomdecor #classroomlibrary #catholicschool #dailyfive

Nautical Classroom Alternative Seating

When I started planning and designing Mrs. B's nautical classroom, I knew I wanted to create an extra-special space for her students to curl up with a book. I had recently discovered Teepee Joy and fell head over heels in love with the concept of adding a reading tent to the classroom. I reached out to Teepee Joy and they graciously provided one of their lovely teepees for Mrs. B's classroom. Teepee Joy has hundreds of fabrics to choose from and deciding on the best one for the nautical classroom transformation was no easy task! There were many great styles in navy blue and red (including anchors and polka dots). I decided on the solid Roses are Red teepee, crossed my fingers, and hoped that it was the right choice!

I breathed a very deep sigh of relief when I saw how fabulous the bright red teepee looked in Mrs. B's nautical classroom. It created the perfect visual anchor for the back of the classroom.

Adorable reading tent in Second Grade Nautical Theme Classroom Makeover | alternative seating | classroom design | classroom decor | Kinder Craze blog #backtoschool #classroom #classroomdecor #classroomlibrary #catholicschool #dailyfive #cafe

The teepee itself was easy to get upright, but it took a few minutes for me to properly situate the dowels that hold up the teepee so that it was fully open, but the little reading teepee looked fantastic once it was all set up.

Adorable reading tent in Second Grade Nautical Theme Classroom Makeover | alternative seating | classroom design | classroom decor | Kinder Craze blog #backtoschool #classroom #classroomdecor #classroomlibrary #catholicschool #dailyfive #cafe

I purchased a few navy blue pillows that perfectly fit the nautical theme at Hobby Lobby and placed one on each side of the teepee, along with two teal pillows that Mrs. B already owned.

Adorable reading tent in Second Grade Nautical Theme Classroom Makeover | alternative seating | classroom design | classroom decor | Kinder Craze blog #backtoschool #classroom #classroomdecor #classroomlibrary #catholicschool #dailyfive #cafe

Isn't this the cutest little reading corner that you have ever seen?!? I was fortunate to be in the classroom when Mrs. B's second graders and their parents entered the classroom for the very first time this fall and everyone's eyes lit up when the saw the teepee tucked into the corner of the room.

Love this adorable reading tent in Second Grade Nautical Theme Classroom Makeover | alternative seating | classroom design | classroom decor | Kinder Craze blog #backtoschool #classroom #classroomdecor #classroomlibrary #catholicschool #dailyfive #cafe

Mrs. B had created simple crate seats for her students last year and they were a perfect fit for her new classroom decor. If you're ever in need of easy, budget-friendly seating; crate seats are the way to go! I placed these seats at each end of the library bookcase and tucked two of them side-by-side to create a mini bench in front of a supply cabinet. A coordinating throw pillow placed on top created a cozy touch and made the seats inviting for students.

Second Grade Nautical Theme Classroom Makeover | alternative seating | classroom design | classroom decor | Kinder Craze blog #backtoschool #classroom #classroomdecor #classroomlibrary #catholicschool #dailyfive #cafe

Here's a view of the classroom library from the front of the room. You can see how perfectly all of the details coordinate with the rest of the decor.

Love this adorable reading tent in Second Grade Nautical Theme Classroom Makeover | alternative seating | classroom design | classroom decor | Kinder Craze blog #backtoschool #classroom #classroomdecor #classroomlibrary #catholicschool #dailyfive #cafe

Extra Pops of Nautical Decor

I had so much fun incorporating nautical details throughout this classroom. One side wall didn't have very much inherent personality; it was just a cinder block wall with some cabinets, a door, a sink, and some lateral cabinets. I added some pennants from the Schoolgirl Style Preppy Nautical collection near the ceiling to add a little color and attached some cute sailboat and whale cutouts from the collection to the built-in cabinets. It made a world of difference. The file cabinet labels and desk nametags are also from the Preppy Nautical printable collection.

Second Grade Nautical Theme Classroom Makeover featuring printables from Schoolgirl Style | alternative seating | classroom design | classroom decor | Kinder Craze blog #backtoschool #classroom #classroomdecor #classroomlibrary #catholicschool #dailyfive #cafeSecond Grade Nautical Theme Classroom Makeover featuring printables from Schoolgirl Style | alternative seating | classroom design | classroom decor | Kinder Craze blog #backtoschool #classroom #classroomdecor #classroomlibrary #catholicschool #dailyfive #cafe

One last detail that I absolutely love is the classroom prayer corner. You see, this second grade classroom is in a Catholic school and each teacher creates a special area in the classroom where students can gather for prayer, reflection, and faith formation. I wanted to anchor the space with a scripture quote that fit the nautical theme so I took to Instagram Stories and asked for ideas. There were many great suggestions, but this was the most popular quote and it was so fitting for this teacher and her students.

bible quote in Second Grade Nautical Theme Classroom Makeover featuring printables from Schoolgirl Style | alternative seating | classroom design | classroom decor | Kinder Craze blog #backtoschool #classroom #classroomdecor #classroomlibrary #catholicschool #dailyfive #cafe

I created a simple PDF and adjusted the print settings in Adobe Reader to have it print poster size with my standard printer. Each 8.5×11″ sheet of paper was essentially a puzzle piece for the poster. I printed the poster onto cardstock for added durability, trimmed the edges off each sheet of paper and glued them together to create the poster. It was a bit of a headache to line up all the pieces, but the completed bulletin board turned out perfect! If you would like this poster for your classroom, scroll all the way to the bottom of this post – I have included it in a free download!

Classroom Supply Organization

With the decor, books, and seating under control, the only thing left to tackle was classroom storage. Like every other elementary teacher, Mrs. B. had drawers filled with essential classroom supplies: markers, pens, index cards, glue rubber bands … you name it. She had everything already sorted and organized. I just gave the industrial-looking drawers a little facelift with my Visual Supply Labels. I printed, laminated, and cut out each label, then attached them to the drawer fronts with a little hot glue.

Organize all those teacher supplies with Visual Supply Labels from Kinder Craze! Second Grade Theme Classroom Makeover featuring printables from Schoolgirl Style | alternative seating | classroom design | classroom decor | Kinder Craze blog #backtoschool #classroom #classroomdecor #classroomlibrary #catholicschool #dailyfive #cafe

Mrs. B. also had tons of great hands-on tools and games for students to use during indoor recess. The items had been contained in gallon size zipper bags and a very eclectic collection of mismatched bins. I went through every single ziplock bag and placed their contents into Sterilite clip bins. Many of the games with sorry, dented, and torn cardboard boxes were also placed into Sterilite bins, which are so much more durable. I love colored plastic bins for classroom storage as much as the next teacher, but I also love good, quality, durable Sterilite bins for practical storage of everyday materials. I picked up the larger clip bins at Target, but Dollar General had tiny ones for $1 each that are great for storing playing cards, dice, and other tiny pieces.

Classroom organization ideas | classroom design | classroom decor | Kinder Craze blog #backtoschool #classroom #classroomdecor #classroomlibrary #catholicschool #dailyfive #cafe

I'm sure you've noticed the numbered bins across the top of the shelf – those are the students' book boxes. The bins are from Lakeshore Learning and the numbered pennants are from … you guessed it … Schoolgirl Style!

Classroom organization ideas | classroom design | classroom decor | Kinder Craze blog #backtoschool #classroom #classroomlibrary #catholicschool

I love how neat and organized everything looks in this corner of the room without sacrificing practicality.

Classroom organization ideas | classroom design | classroom decor | Kinder Craze blog #backtoschool #classroom #classroomlibrary #catholicschool

Love this gorgeous nautical theme second grade classroom from Kinder Craze. You have to see the complete makeover | Schoolgirl Style | Classroom Decor | Kinder Craze blog

Nautical Classroom Teacher Corner

Even though Mrs. B never sits at her desk with students in the room, she still needed a traditional desk and work area to help her lesson plan and manage all of the paperwork that comes with being a teacher. She had a corner of the room already set up to use as her home base, but I made a few simple changes to make it more manageable.

Love this gorgeous nautical theme second grade classroom from Kinder Craze. You have to see the complete makeover | Schoolgirl Style | Classroom Decor | Kinder Craze blog

Mrs. B puts her heart and soul into her classroom and students, but she also has a family that she is deeply devoted to. I learned firsthand last year just how difficult it can be to juggle a family and life as a teacher, so I wanted to add a special touch to this corner of the room for her. I mounted some family photos onto black cardstock and created a little gallery wall on the bulletin board above her desk. Sticking with the nautical theme, I titled this bulletin board “The Crew”.

Love this super-sweet teacher area in nautical theme second grade classroom from Kinder Craze. You have to see the complete makeover | Schoolgirl Style | Classroom Decor | Kinder Craze blog

Teacher desk area | nautical theme classroom | classroom decor | classroom design | classroom makeover | Kinder Craze blog

Once I had created a joyful, functional work surface for Mrs. B, it was on to her personal supplies! She kept all of her teaching manuals, instructional materials, and prepped copies within easy reach on the shelves under the window beside her desk. I contained all of the manuals and smaller items in colored bins to coordinate with the rest of the decor and placed them back on the shelf. The blue and white baskets are from Big Lots. I purchased the red bins from Lakeshore Learning and labeled each one with a day of the week so Mrs. B. could easily organize her daily instructional materials. I included the M-F labels in a free download for you at the bottom of this post!

Easy Classroom organization | classroom makeover | nautical theme classroom | classroom decor | Kinder Craze blog

And there you have it! A complete tour of the nautical theme second grade classroom. I absolutely love how the space turned out and it brought me so much joy to create a space that I knew Mrs. B and her students would love.

Thank you so, so much to Teepee Joy for graciously contributing the adorable red teepee for Mrs. B's classroom transformation. I know her students will enjoy using it for many years to come!

Gorgeous classroom library! Second Grade Nautical Theme Classroom Makeover | classroom design | classroom decor | Kinder Craze blog #backtoschool #classroom #classroomdecor

Free Nautical Theme Classroom Decor

I used many printable resources from the Schoolgirl Style Preppy Nautical pack for this classroom, but I also custom-created some items for the space that I'm happy to offer as my FREE gift to you. Click the image below to access free Nautical decor that includes calendar numbers, M-F daily bin labels, the bible quote poster, and the red and blue templates that I used to create Daily Five and CAFE signs for Mrs. B.

(Please note that The Two Sisters own the copyright and trademark for CAFE and Daily 5. As much as I would love to share the exact files that I created for this classroom, I'm not able to do so for legal and ethical reasons. You can add any of your own text to the designs to make them work for you and your classroom needs.)


Second Grade Nautical Theme Classroom Makeover | classroom design | classroom decor | Kinder Craze blog #backtoschool #classroom #classroomdecor

Even though it has been several months, I am still so in love with Mrs. B's nautical classroom makeover. The bold stripes and polka dots put a fresh new spin on a classic color scheme to create such a fun place for her students to learn and work. Thank you again to Teepee Joy for the gorgeous lipstick-red Teepee – it was the piece to complete the space!

The post Second Grade Nautical Theme Classroom Makeover appeared first on Kinder Craze.

Easy Pattern Bracelet Toddler Craft

$
0
0

This post contains affiliate links. I earn a small commission each time someone makes a purchase through one of my links, which helps to support the blog.

I can’t believe that it has been two years since I decided to step out of the classroom and stay home to be a full-time mommy to my daughter, Dessa. In those two years, a lot has changed. Our family was blessed last fall with the arrival of our son, Harvey. The struggles of balancing motherhood with work and everything else has continued to be a daily struggle, and life at home has continued to keep me extra busy.

My husband and I had been planning to send Dessa to preschool for the first time this fall, but we ultimately decided to delay preschool for a year and provide her with more intentional learning experiences at home. I don’t have plans to formally homeschool my children now or in the future, but Dessa is young enough that she doesn’t require elaborate lesson plans. We use play-based and simple activities at home as a springboard to promote her learning and development, and she is thriving.

Last week we created simple bracelets with pony beads and pipe cleaner, which served as a perfect opportunity to work on patterns. If you are looking for a simple way to engage your toddler, this activity just might be perfect for your family! (And if you have a baby at home who is always getting into mischief, do what we did and save this project for when the baby is asleep.)

Looking for easy toddler activities? Use pony beads and pipe cleaners to create a simple bracelet. It's a great way to develop fine motor skills and work on pincer grasp. Make the activity even more meaningful by encouraging your child to make patterns. Pattern bracelets are a great mess-free activity for 3 year old and 4 year old children to work on at-home or in a preschool classroom.

This is such a simple task to do with your toddler, but it is highly engaging. I didn’t want to overwhelm Dessa with a rainbow of bead colors and too many choices to distract her from creating patterns, so I let Dessa pick the two colors she wanted to work with first. She chose red and blue beads with a blue pipe cleaner. I got her started on the activity by sliding one bead down the pipe cleaner and folding the end of the pipe cleaner to prevent the rest of the beads from sliding off the back as Dessa worked. (We happened to have star beads that Dessa really wanted to incorporate into her bracelet, but any bead would work.) Next, I got her started by demonstrating how to create a simple ABAB pattern with red and blue beads, then let her do the rest.

Little by little, Dessa worked to continue the pattern and place additional beads onto her bracelet. I’ve attempted some activities during the quarantine that were a total flop and couldn’t hold Dessa’s attention for more than two minutes, but this was not the case with beaded bracelets. She was completely engaged and you could practically feel her level of concentration in the air.

Even though this was designed to be an activity to work on Dessa’s patterning skills, it had the added benefit of being a great fine motor activity. Any activity that activates and challenges those little fingers now will make writing and coloring easier (and less stressful) for Dessa later on when she is ready for school.

Looking for easy toddler activities? Use pony beads and pipe cleaners to create a simple bracelet. It's a great way to develop fine motor skills and work on pincer grasp. Make the activity even more meaningful by encouraging your child to make patterns. Pattern bracelets are a great mess-free activity for 3 year old and 4 year old children to work on at-home or in a preschool classroom.

If I happened to see two blue beads or red beads in a row, I simply pointed out what had happened, and Dessa was quick to remove the extra bead and replace it with the correct color.

After a few minutes, Dessa’s first bracelet was complete! I threaded the loose end of the pipe cleaner through the first fold, then tucked the end under the beads to keep the bracelet secure.

Dessa couldn’t wait to create more bracelets, so we kept the good times rolling! Next up was a purple and green bracelet, then one with orange and yellow beads. I offered support and encouragement along the way for the purple bracelet, then worked on a few household tasks while Dessa beaded the orange bracelet all by herself. Occasionally, I would remind her to do a yellow/orange pattern, but Dessa worked nearly independently and it was a good opportunity for me to see just how well she can execute an ABAB pattern on her own. Not surprisingly, she needs more practice. And that’s perfectly ok. I don’t expect her to become a pattern master in a day.

Looking for easy toddler activities? Use pony beads and pipe cleaners to create a simple bracelet. It's a great way to develop fine motor skills and work on pincer grasp. Make the activity even more meaningful by encouraging your child to make patterns. Pattern bracelets are a great mess-free activity for 3 year old and 4 year old children to work on at-home or in a preschool classroom.

Dessa was extremely cooperative during the activity and made patterns for me, but I knew she was itching to make a bracelet with all the bead colors. I had promised that she could make a rainbow bracelet when she was finished making patterns and Dessa was so happy when she finally had a chance to create that beaded rainbow.

Looking for easy toddler activities? Use pony beads and pipe cleaners to create a simple bracelet. It's a great way to develop fine motor skills and work on pincer grasp. Make the activity even more meaningful by encouraging your child to make patterns. Pattern bracelets are a great mess-free activity for 3 year old and 4 year old children to work on at-home or in a preschool classroom.

Looking for easy toddler activities? Use pony beads and pipe cleaners to create a simple bracelet. It's a great way to develop fine motor skills and work on pincer grasp. Make the activity even more meaningful by encouraging your child to make patterns. Pattern bracelets are a great mess-free activity for 3 year old and 4 year old children to work on at-home or in a preschool classroom.

Beaded pattern bracelets for toddlers.

Once her rainbow bracelet was complete, I bent the end of the pipe cleaner, tucked it through the beads, and handed Dessa her final masterpiece. She proceeded to slip on all four bracelets and show off her brand new arm candy.

Looking for easy toddler activities? Use pony beads and pipe cleaners to create a simple bracelet. It's a great way to develop fine motor skills and work on pincer grasp. Make the activity even more meaningful by encouraging your child to make patterns. Pattern bracelets are a great mess-free activity for 3 year old and 4 year old children to work on at-home or in a preschool classroom. Looking for easy toddler activities? Use pony beads and pipe cleaners to create a simple bracelet. It's a great way to develop fine motor skills and work on pincer grasp. Make the activity even more meaningful by encouraging your child to make patterns. Pattern bracelets are a great mess-free activity for 3 year old and 4 year old children to work on at-home or in a preschool classroom.

If you have a toddler at home and you’re searching for a way to engage your child in a meaningful way, try making beaded bracelets! It was a hit with Dessa and I hope it will be for your child too.

Looking for easy toddler activities? Use pony beads and pipe cleaners to create a simple bracelet. It's a great way to develop fine motor skills and work on pincer grasp. Make the activity even more meaningful by encouraging your child to make patterns. Pattern bracelets are a great mess-free activity for 3 year old and 4 year old children to work on at-home or in a preschool classroom.

Stock Up On Project Supplies

These days I buy almost everything from Amazon and I’m sure you can relate. Here are a few quick shopping links to get you started if you want to create beaded pattern bracelets at home. Just click on any of the images below!

   Making pattern bracelets with pipe cleaner and pony beads is a simple and craft to do with your toddler.

We keep things pretty simple at my house. My husband and I choose to entertain our two young children with simple activities and very few toys. You can often see glimpses into our daily activities in Instagram stories on our lifestyle account @crazytogetherblog or get a more in-depth look on the Crazy Together blog.

The post Easy Pattern Bracelet Toddler Craft appeared first on Kinder Craze.

Easy Preschool Fall Tree Art Project

$
0
0

Fall has arrived in Michigan! The days are getting shorter, temperatures are dropping, and the leaves are changing color. Peak color in our area has recently passed, but I am clinging to every beautiful moment of this season. Right now is the perfect time to be out for a walk because there is still plenty of color on the trees to enjoy, but many leaves have already fallen and they make the most delightfully crunchy sound with every step we take. I’m not the only person in the Gavin house that is embracing fall – my daughter Dessa is entranced by the colorful leaves. She collects them on our daily walks, treads repeatedly through beds of fallen leaves on the sidewalk, and especially loves to “splash” in the leaves as she throws them in the air. I decided to channel all that leafy enthusiasm with a super-fun, quick and easy tissue paper preschool craft. This simple fall art project is virtually mess-free and only uses a few basic art supplies, which is always a win in our house. Ready to get started?

This post contains affiliate links. I earn a small commission each time someone makes a purchase through one of my links, which helps to support the blog. 

Fall is here! This fall tree craft project is super-simple and uses a few basic supplies to make a stunning tree with falling tissue paper leaves. This fall kids craft is a great project for preschool or kindergarten students. Toddlers can do this one too with a little extra help and support. Perfect for at-home or in a classroom setting.

Materials Needed

Before you begin, you will want to collect a few basic supplies to get started. Here is everything you need. (Don’t you just love a good project with a short supply list?)

white cardstock (white paper will work, too)
brown and green Do-A-Dot Markers
glue stick
red, yellow, and orange tissue paper

This just might be the world’s easiest art project to prep for a preschooler. The only work I did in advance was cut the tissue paper into approximately 1″ squares. The actual sizes of each piece varied because I did it in a hurry, but my quick handiwork got the job done. If you want to be extra efficient, you can always purchase a set of pre-cut tissue paper squares on Amazon. (They’re great for making seasonal window decorations – click here to see some of my favorite window crafts.)


Making the Tree

Once I was ready to start crafting with my little one, I used the brown dot marker to draw two curved lines as the tree trunk. That’s the only work I did to help Dessa create this project. Everything else was all her, which is one more reason to love this craft!

Fall is here! This fall tree craft project is super-simple and uses a few basic supplies to make a stunning tree with falling tissue paper leaves. This fall kids craft is a great project for preschool or kindergarten students. Toddlers can do this one too with a little extra help and support. Perfect for at-home or in a classroom setting.

I handed Dessa the dot marker and told her to paint the tree trunk brown. She started by drawing her own lines at the top and bottom of the trunk to enclose the trunk, then began to fill it with brown dots.

Fall is here! This fall tree craft project is super-simple and uses a few basic supplies to make a stunning tree with falling tissue paper leaves. This fall kids craft is a great project for preschool or kindergarten students. Toddlers can do this one too with a little extra help and support. Perfect for at-home or in a classroom setting.

Fall is here! This fall tree craft project is super-simple and uses a few basic supplies to make a stunning tree with falling tissue paper leaves. This fall kids craft is a great project for preschool or kindergarten students. Toddlers can do this one too with a little extra help and support. Perfect for at-home or in a classroom setting.

Dessa loves using dot markers and uses them almost every day in our house. I think the ability to quickly and efficiently fill a space gives her a boost in confidence and I’ll take a dot marker picture any day over a picture scribbled in with traditional markers because the lines are so thick, bold, and bright.

Fall is here! This fall tree craft project is super-simple and uses a few basic supplies to make a stunning tree with falling tissue paper leaves. This fall kids craft is a great project for preschool or kindergarten students. Toddlers can do this one too with a little extra help and support. Perfect for at-home or in a classroom setting.

Once the tree trunk was filled in, it was time to add a little grass to our scene! Dessa used the green dot marker to put some grass at the bottom of the picture. A little bit of green ink got onto our coffee table, but it wiped right off without leaving a stain.

Fall is here! This fall tree craft project is super-simple and uses a few basic supplies to make a stunning tree with falling tissue paper leaves. This fall kids craft is a great project for preschool or kindergarten students. Toddlers can do this one too with a little extra help and support. Perfect for at-home or in a classroom setting.

You’ll also notice a few tissue paper leaves that have already been added to our tree. Dessa got really excited and wanted to add some leaves before she painted the green grass. I’ll fill you in on that step in a minute, but it’s easier to explain the project in a more logical order rather than skip back and forth between steps.

Fall is here! This fall tree craft project is super-simple and uses a few basic supplies to make a stunning tree with falling tissue paper leaves. This fall kids craft is a great project for preschool or kindergarten students. Toddlers can do this one too with a little extra help and support. Perfect for at-home or in a classroom setting. Fall is here! This fall tree craft project is super-simple and uses a few basic supplies to make a stunning tree with falling tissue paper leaves. This fall kids craft is a great project for preschool or kindergarten students. Toddlers can do this one too with a little extra help and support. Perfect for at-home or in a classroom setting.

Fall is here! This fall tree craft project is super-simple and uses a few basic supplies to make a stunning tree with falling tissue paper leaves. This fall kids craft is a great project for preschool or kindergarten students. Toddlers can do this one too with a little extra help and support. Perfect for at-home or in a classroom setting. Fall is here! This fall tree craft project is super-simple and uses a few basic supplies to make a stunning tree with falling tissue paper leaves. This fall kids craft is a great project for preschool or kindergarten students. Toddlers can do this one too with a little extra help and support. Perfect for at-home or in a classroom setting.

After the tree trunk and green grass were painted, it was time to add some fall leaves! Dessa used the glue stick to apply a little bit of glue onto individual pieces of tissue paper, then added them around her tree trunk.

Fall is here! This fall tree craft project is super-simple and uses a few basic supplies to make a stunning tree with falling tissue paper leaves. This fall kids craft is a great project for preschool or kindergarten students. Toddlers can do this one too with a little extra help and support. Perfect for at-home or in a classroom setting.

It didn’t take long before she had created a beautiful fall tree with falling tissue paper leaves.

Fall is here! This fall tree craft project is super-simple and uses a few basic supplies to make a stunning tree with falling tissue paper leaves. This fall kids craft is a great project for preschool or kindergarten students. Toddlers can do this one too with a little extra help and support. Perfect for at-home or in a classroom setting. Fall is here! This fall tree craft project is super-simple and uses a few basic supplies to make a stunning tree with falling tissue paper leaves. This fall kids craft is a great project for preschool or kindergarten students. Toddlers can do this one too with a little extra help and support. Perfect for at-home or in a classroom setting. Fall is here! This fall tree craft project is super-simple and uses a few basic supplies to make a stunning tree with falling tissue paper leaves. This fall kids craft is a great project for preschool or kindergarten students. Toddlers can do this one too with a little extra help and support. Perfect for at-home or in a classroom setting.

This was such a great preschool art project for so many reasons. The simplicity and minimal prep made it a great activity for this busy Mamma, but it also provided a little fine motor practice and an opportunity to work with glue for my three-year-old.

Fall is here! This fall tree craft project is super-simple and uses a few basic supplies to make a stunning tree with falling tissue paper leaves. This fall kids craft is a great project for preschool or kindergarten students. Toddlers can do this one too with a little extra help and support. Perfect for at-home or in a classroom setting.

Even better, this is a Dessa-created piece of artwork that I’m so excited to display in our home.

Fall is here! This fall tree craft project is super-simple and uses a few basic supplies to make a stunning tree with falling tissue paper leaves. This fall kids craft is a great project for preschool or kindergarten students. Toddlers can do this one too with a little extra help and support. Perfect for at-home or in a classroom setting.

The post Easy Preschool Fall Tree Art Project appeared first on Kinder Craze.

Easy and Fun Thanksgiving Turkey Dot Marker Art

$
0
0

Thanksgiving is just a few days away and I think we all can agree that this one feels different from any Thanksgiving that any of us can remember. My husband and I are planning to stay home and prepare an intimate family dinner for ourselves and the kids. The stakes feel high since Thanksgiving is basically the kick-off for the holiday season and I’m determined to make our first-ever Thanksgiving at home extra special for my three-year-old daughter Dessa. She doesn’t exactly know what to expect for the holiday, but Dessa does know that we are taking time to think about all the things we are thankful for, that turkey is on the menu for our Thanksgiving dinner, and that many of our neighbors have silly turkey decorations in their yards. I decided to lean into the turkey theme and create a fun Thanksgiving turkey art project with Dessa’s favorite art supply: Do-A-Dot markers.

This post contains affiliate links. I earn a small commission each time someone makes a purchase through one of my links, which helps to support the blog. 

This painted turkey art project is the perfect Thanksgiving craft for kids. It's simple, washable and makes a great decoration for your family celebration. This craft is simple enough for a toddler, ideal for preschoolers, and the novelty is sure to be enjoyed by older children as well. Grab some dot markers and check out the full tutorial.

I love everything about this project, and here are a few of the reasons you will love this painted turkey Thanksgiving art too:

It’s simple.
It only requires a few basic supplies (that we already had on-hand).
Kids of all ages will probably love it.
The colors are gorgeously vibrant.
It’s easy for children to work on with some independence.
It keeps children engaged for longer than 10 minutes.
The marker ink is washable.
The finished product isn’t covered in scribbles (which is huge in my book).

The fact that this Thanksgiving art project is larger than a standard sheet of paper makes it feel extra big and special. It also conveniently doubles as fun decor that you can hang to display for your family celebration. (You better believe that our little girl’s artwork will hang prominently in our house on Thursday!)

This painted turkey art project is the perfect Thanksgiving craft for kids. It's simple, washable and makes a great decoration for your family celebration. This craft is simple enough for a toddler, ideal for preschoolers, and the novelty is sure to be enjoyed by older children as well. Grab some dot markers and check out the full tutorial.

PROJECT SUPPLIES


Seriously, there is so much to love about this project and I can’t wait to walk you through it. Here are a few quick notes before we dive in:

Age Level: This project was great for my three-year-old and I’m certain that it could easily hold the attention of five- and six-year-olds, too. If you’re working with preschool children, I recommend only drawing small sections at a time for your child to fill in to help keep any feelings of overwhelm at bay. Younger children don’t have the ability to think ahead and keep their hands and sleeves out of wet paint, so if you are doing this with your preschooler, you will probably want to encourage your child to start at the top and rotate the turkey as he or she works to minimize the mess.

For older kids, you can probably draw the entire turkey right away and enjoy the peace and quiet while they independently fill the bird and feathers with dots.

Marker choice: I highly recommend using a black Sharpie to draw the turkey and feathers. The permanent marker didn’t bleed onto my coffee table through the white paper and, more importantly, it didn’t bleed from the wet ink of the dot markers. I originally used a black Crayola marker to make the turkey body and face because I liked the idea of a bold outline for the turkey, but quickly realized that the ink was rubbing into the dot art that Dessa was creating. I used a sharpie on the turkey feathers and was much more pleased with the result. The Sharpie ink didn’t bleed and made a much cleaner outline.

Do-A-Dot markers are washable! If you try this activity with preschoolers, there is a very good chance they will end up wearing some dot marker ink on their clothes. Five minutes into this project, Dessa got brown ink across the chest on her shirt. I foolishly tried to dab the ink away and it just sort of smeared and made a mess. Later on, I sprayed the stain with Dreft and it came cleanly out. Getting dot marker ink on our clothes has become a regular event in our house and it always washes cleanly out.

The setup for this project was quick and incredibly simple (which is always a win in my book!) I cut a large sheet of paper of the big roll of white paper that I always try to keep stocked in the house (it has come in clutch so many times for a big project to help occupy my three-year-old) and used a few pieces of painters tape to hold it in place on our coffee table. Next, I grabbed a black marker and drew a quick outline of a turkey’s body with eyes and a beak. I forgot to add a red wattle next to the beak so you’ll want to make sure you remember this key turkey feature. If you forget, you can always redeem yourself by adding a few red dot stickers as a wattle once the painting is complete. (That’s what we did and it worked out great.)

After that, grab some Do-A-Dot markers and let the fun begin!

Thanksgiving turkey dot art project for kids

I’ve been encouraging Dessa to thoughtfully choose colors for her projects that portray animals and objects the way God made them. Together we decided that orange would be the best color for the turkey’s beak and I suggested that his body should be brown.

Easy Thanksgiving turkey craft for kids Fun and easy Thanksgiving turkey craft for preschoolers

This is a good time to introduce the concept of starting to paint from the top of a picture and to work down from there. If your child starts at the bottom of the turkey, he’s sure to end up with paint all over his sleeve.

This painted turkey art project is the perfect Thanksgiving craft for kids. It's simple, washable and makes a great decoration for your family celebration. This craft is simple enough for a toddler, ideal for preschoolers, and the novelty is sure to be enjoyed by older children as well. Grab some dot markers and check out the full tutorial.

Once the body was painted, it was time to add feathers!

I drew eight feathers onto the bottom of the turkey. Remember that young children can easily feel overwhelmed, so I highly recommend only drawing a few feathers at a time. Dessa selected which colors she wanted to use for each feather and my only guidance was that I encouraged her to make each feather a different color. I often plan colors with Dessa ahead of time, then let her work independently. Marking each feather with a single dot helps her remember the plan we discussed so she can follow through on her own.

This painted turkey art project is the perfect Thanksgiving craft for kids. It's simple, washable and makes a great decoration for your family celebration. This craft is simple enough for a toddler, ideal for preschoolers, and the novelty is sure to be enjoyed by older children as well. Grab some dot markers and check out the full tutorial.

You may have noticed the brown stain on Dessa’s shirt in the photo above. She accidentally got ink on her shirt while we were rolling up sleeves. It looked pretty bad at first and the stain spread when I dabbed it with a wet rag, but the spot disappeared completely after I put the shirt in the laundry. That’s my favorite thing about Do-A-Dot markers – they always wash out of my kids’ clothes!

This painted turkey art project is the perfect Thanksgiving craft for kids. It's simple, washable and makes a great decoration for your family celebration. This craft is simple enough for a toddler, ideal for preschoolers, and the novelty is sure to be enjoyed by older children as well. Grab some dot markers and check out the full tutorial.

Once our feather colors were planned, it was time to paint! You can use dot markers to draw strokes like an actual marker, but I prefer to fill the space with dots. It looks great and requires more concentration and patience from your little artist.

This painted turkey art project is the perfect Thanksgiving craft for kids. It's simple, washable and makes a great decoration for your family celebration. This craft is simple enough for a toddler, ideal for preschoolers, and the novelty is sure to be enjoyed by older children as well. Grab some dot markers and check out the full tutorial. This painted turkey art project is the perfect Thanksgiving craft for kids. It's simple, washable and makes a great decoration for your family celebration. This craft is simple enough for a toddler, ideal for preschoolers, and the novelty is sure to be enjoyed by older children as well. Grab some dot markers and check out the full tutorial.

Once Dessa colored the eight feathers I drew, it was time to take a break. We set the turkey aside and resumed our Thanksgiving art project the following day. At this point, Dessa knew exactly what to do and each feather was relatively quick to complete so I went ahead and drew all of the remaining feathers on her turkey. I also turned the turkey sideways on our coffee table in an attempt to spare her hands and sleeves of any ink transfers.

This painted turkey art project is the perfect Thanksgiving craft for kids. It's simple, washable and makes a great decoration for your family celebration. This craft is simple enough for a toddler, ideal for preschoolers, and the novelty is sure to be enjoyed by older children as well. Grab some dot markers and check out the full tutorial.

We once again designated each feather color with a single dot, then I let Dessa take over the Thanksgiving art project.

This painted turkey art project is the perfect Thanksgiving craft for kids. It's simple, washable and makes a great decoration for your family celebration. This craft is simple enough for a toddler, ideal for preschoolers, and the novelty is sure to be enjoyed by older children as well. Grab some dot markers and check out the full tutorial. This painted turkey art project is the perfect Thanksgiving craft for kids. It's simple, washable and makes a great decoration for your family celebration. This craft is simple enough for a toddler, ideal for preschoolers, and the novelty is sure to be enjoyed by older children as well. Grab some dot markers and check out the full tutorial.

I had washed her shirt overnight and you can see that it was free of brown stains after being laundered.

This painted turkey art project is the perfect Thanksgiving craft for kids. It's simple, washable and makes a great decoration for your family celebration. This craft is simple enough for a toddler, ideal for preschoolers, and the novelty is sure to be enjoyed by older children as well. Grab some dot markers and check out the full tutorial.

Little by little, Dessa worked to paint the rest of the turkey feathers and the bird became more and more vibrant with each dot she stamped. 

This painted turkey art project is the perfect Thanksgiving craft for kids. It's simple, washable and makes a great decoration for your family celebration. This craft is simple enough for a toddler, ideal for preschoolers, and the novelty is sure to be enjoyed by older children as well. Grab some dot markers and check out the full tutorial. This painted turkey art project is the perfect Thanksgiving craft for kids. It's simple, washable and makes a great decoration for your family celebration. This craft is simple enough for a toddler, ideal for preschoolers, and the novelty is sure to be enjoyed by older children as well. Grab some dot markers and check out the full tutorial.

This painted turkey art project is the perfect Thanksgiving craft for kids. It's simple, washable and makes a great decoration for your family celebration. This craft is simple enough for a toddler, ideal for preschoolers, and the novelty is sure to be enjoyed by older children as well. Grab some dot markers and check out the full tutorial. This painted turkey art project is the perfect Thanksgiving craft for kids. It's simple, washable and makes a great decoration for your family celebration. This craft is simple enough for a toddler, ideal for preschoolers, and the novelty is sure to be enjoyed by older children as well. Grab some dot markers and check out the full tutorial.

Once Dessa finished painting, we added a few red dot stickers as the turkey’s wattle and our project was complete!

This painted turkey art project is the perfect Thanksgiving craft for kids. It's simple, washable and makes a great decoration for your family celebration. This craft is simple enough for a toddler, ideal for preschoolers, and the novelty is sure to be enjoyed by older children as well. Grab some dot markers and check out the full tutorial.

Dessa was so incredibly proud of herself for completing this project. She absolutely loves her turkey Thanksgiving art and was beaming when she posed with her painting.

This painted turkey art project is the perfect Thanksgiving craft for kids. It's simple, washable and makes a great decoration for your family celebration. This craft is simple enough for a toddler, ideal for preschoolers, and the novelty is sure to be enjoyed by older children as well. Grab some dot markers and check out the full tutorial.

GET SUPPLIES FOR YOUR TURKEY DOT ART PROJECT

PS –  Just in case your little one wants to get extra silly, you can always add more dot stickers to create an extra-long wattle.

This painted turkey art project is the perfect Thanksgiving craft for kids. It's simple, washable and makes a great decoration for your family celebration. This craft is simple enough for a toddler, ideal for preschoolers, and the novelty is sure to be enjoyed by older children as well. Grab some dot markers and check out the full tutorial.

Happy Thanksgiving to all of you! I know that this year’s celebration will look different from most, but I sincerely hope that it is filled with joy and appreciation for the gifts we have.

You can follow along with more of Dessa’s shenanigans and our household adventures on my lifestyle blog, Crazy Together and discover more Thanksgiving printables and resources here.

The post Easy and Fun Thanksgiving Turkey</br> Dot Marker Art appeared first on Kinder Craze.

Preschool-Friendly Paper Plate Christmas Wreath Craft

$
0
0

Creating crafts at Christmastime will always be one of my favorite ways to celebrate the holidays with children. I loved incorporating crafts and art projects into our holiday fun when I taught kindergarten, and now that my daughter Dessa is old enough for preschool, the crafts keep rolling. We recently created a simple paper plate Christmas wreath that was the perfect age-appropriate project and it even offered a little fine motor practice. Get ready to pin this craft because it’s fast, easy, and uses only a few basic materials you might already have lying around the house!

This post contains affiliate links. I earn a small commission each time someone makes a purchase through one of my links, which helps to support the blog. 

Here's a fun and easy Christmas craft that's preschool-friendly and great for little hands. All you need is a paper plate, some tissue paper squares and a bottle of glue - ribbon is just a bonus if you're feeling "extra"

Paper Plate Christmas Craft Materials

The items needed for this project are so simple and basic. There is a good chance you already have everything you need somewhere in your house.

Paper Plate Christmas Wreath craft supplies: tissue paper, glue, paper plate and foam paintbrush

White paper plate with the center cut out
Bottle of liquid glue
Red and Green tissue paper squares (approximately 1.5″)
Foam paintbrush
Small dish or cup to hold the glue – I like these ones
Red velvet tie-on bows (optional)
Hole Punch (optional)

CLICK TO STOCK UP ON SUPPLIES


Creating the Wreath

Once your materials are assembled, it’s time to dive right in. Pour a little glue into a cup or dish. I like to twist the top just a little bit so the glue comes out slowly if my little one is helping with this step. This helps to regulate how much glue gets poured into the cup and it also helps to build finger strength from all that squeezing.

Here's a fun and easy Christmas craft that's preschool-friendly and great for little hands. All you need is a paper plate, some tissue paper squares and a bottle of glue - ribbon is just a bonus if you're feeling "extra"

Once the glue is ready to go, use the foam paintbrush to spread it onto the paper plate. We did a 6″ section to get started, but there’s no reason why you can’t spread glue all over the entire plate right from the start.

Here's a fun and easy Christmas craft that's preschool-friendly and great for little hands. All you need is a paper plate, some tissue paper squares and a bottle of glue - ribbon is just a bonus if you're feeling "extra"

After the glue has been spread onto the paper plate, it’s time to add the tissue paper. Place one square at a time onto the wet glue. I encouraged Dessa to go slow and to lay the pieces flat as she placed them onto the wreath. The dry squares stick together easily, so this provided a good opportunity to slow down and concentrate on the task at-hand. There isn’t any need to try to arrange the squares a certain way since the random, messy look is a better representation of an actual evergreen wreath.

Here's a fun and easy Christmas craft that's preschool-friendly and great for little hands. All you need is a paper plate, some tissue paper squares and a bottle of glue - ribbon is just a bonus if you're feeling "extra"

Since we had only applied glue to a section of the plate when we started the project, it was time to finish spreading glue around the entire circle. Then we added more tissue paper squares.

Here's a fun and easy Christmas craft that's preschool-friendly and great for little hands. All you need is a paper plate, some tissue paper squares and a bottle of glue - ribbon is just a bonus if you're feeling "extra" Here's a fun and easy Christmas craft that's preschool-friendly and great for little hands. All you need is a paper plate, some tissue paper squares and a bottle of glue - ribbon is just a bonus if you're feeling "extra"

Dessa was so careful and deliberate with every tissue paper square that she glued onto her wreath. She even stopped a few times to turn the wreath over so she could check and see if any of the squares fell off. This was completely her idea and it was one of those things that just sort of left me in awe of the way her brain is developing.

Then it was back to work.

Another status check of her wreath led to an unexpected visit from a silly lion girl.

Dessa added a few more green squares to her wreath, and we were ready for the second part of our project.

Adding Tissue Paper Berries to the Wreath

Once our Christmas paper plate craft was satisfactorily covered with green tissue paper squares, it was time to turn our attention to the pre-cut squares of red tissue paper. Dessa squeezed and squished each red piece of tissue paper into tiny red decorative berries for our wreath (or as Dessa explained, “the kind of berries that birds eat.”)

Her little fingers worked so hard to form tight little berry balls for her wreath and the activity provided a great opportunity to develop those fine motor skills.

Here's a fun and easy Christmas craft that's preschool-friendly and great for little hands. All you need is a paper plate, some tissue paper squares and a bottle of glue - ribbon is just a bonus if you're feeling "extra"

Once the tissue paper berries were complete, Dessa placed one small drop of glue at a time around the wreath and gently placed her “berries” onto the glue.

Here's a fun and easy Christmas craft that's preschool-friendly and great for little hands. All you need is a paper plate, some tissue paper squares and a bottle of glue - ribbon is just a bonus if you're feeling "extra" Here's a fun and easy Christmas craft that's preschool-friendly and great for little hands. All you need is a paper plate, some tissue paper squares and a bottle of glue - ribbon is just a bonus if you're feeling "extra"

I was amazed at how well-spaced all of her berries were. I was certain that Dessa’s finished wreath would be 90% bare with a clump of berries gathered in one small area. She surprised me with this detail.

Honestly, this would be a great stopping point for the Christmas craft – especially if it were spur of the moment and these were the only supplies you had on-hand. But I really wanted to add a velvet bow as a finishing touch to Dessa’s tissue paper Christmas wreath, so we waited for the glue to dry. Dessa embraced the opportunity to pose like a lion one more time.


Attaching the Bow

Once all the glue had dried, I grabbed my hole punch and a small velvet tie-on bow. I bought a pack of bows from my local Target store, but you can order similar bows on Amazon. (This set with the little bells is especially cute.)

Punch two holes next to each other at the top of your wreath and use the bow’s twist-ties to secure it into place.

Here's a fun and easy Christmas craft that's preschool-friendly and great for little hands. All you need is a paper plate, some tissue paper squares and a bottle of glue - ribbon is just a bonus if you're feeling "extra" Here's a fun and easy Christmas craft that's preschool-friendly and great for little hands. All you need is a paper plate, some tissue paper squares and a bottle of glue - ribbon is just a bonus if you're feeling "extra"

The finished result is a perfectly adorable tissue paper Christmas wreath! I love this sweet little craft and was so pleased with how it turned out.

Here's a fun and easy Christmas craft that's preschool-friendly and great for little hands. All you need is a paper plate, some tissue paper squares and a bottle of glue - ribbon is just a bonus if you're feeling "extra"

Dessa couldn’t wait to find the perfect location to hang her finished Christmas wreath and I loved seeing the look of pride on her face.

Here's a fun and easy Christmas craft that's preschool-friendly and great for little hands. All you need is a paper plate, some tissue paper squares and a bottle of glue - ribbon is just a bonus if you're feeling "extra"

This paper plate Christmas wreath was the perfect fast craft to complete with my three year old. I loved how easy it was to prep and the fact that the tissue paper and glue kept the mess to a minimum. If you’re looking for a simple craft to create at home or in the classroom with little ones in the last days leading up to Christmas, I highly recommend this project.

Wishing you all a safe, healthy, and merry Christmas from my family to yours! Stop by my lifestyle blog, Crazy Together for more glimpses into our life at home with two little ones – along with some fashion, decor, and financial goals mixed in.

Here's a fun and easy Christmas craft that's preschool-friendly and great for little hands. All you need is a paper plate, some tissue paper squares and a bottle of glue - ribbon is just a bonus if you're feeling "extra"

Click any image below to stock up on project supplies from Amazon.


The post Preschool-Friendly Paper Plate</br> Christmas Wreath Craft appeared first on Kinder Craze.

Dot Marker Rainbow Name Tracing

$
0
0

As a busy mom of two young children, I know the value of simple activities that are quick to set up and keep children engaged. Even better is when an activity helps reinforce an academic skill like letter recognition. My daughter Dessa is now three years old and technically “preschool” age (even though she’s still at home with me full time), but dot markers will always be one of our tried-and-true art supplies for sparking her creativity and imagination, even for a task that’s as simple as tracing her name with marker dots. I actually took these photos of Dessa using dot markers to trace the letters of her name last spring and just recently rediscovered them on my computer. Fortunately, the activity is timeless and it’s never too late to share an engaging activity for young learners.

This post contains affiliate links. I earn a small commission each time someone makes a purchase through one of my links, which helps to support the blog. 

graphic that reads "dot marker rainbow names for preschoolers" with photo of child using bingo dotters to trace name

Materials Needed

The setup for this dot marker name tracing is truly as simple as it looks and only takes about 60 seconds. I grabbed a set of Crayola markers, our all-time favorite Do-A-Dot Markers (I store mine in a container like this for easy organization on our craft shelf), and a sheet of paper. A standard sheet of 8.5×11″ paper would work in a pinch for short names, but if your child’s name has a lot of letters, I recommend having some legal-size paper on hand, which is what I used with Dessa on this day. (Making a banner of extra big letters with a white paper roll would be a fun twist on this project too!)


Name Tracing Activity Set-Up

Grab your traditional markers and write your child’s name in large letters across the paper, using a different color for each letter. Then give your child the coordinating colors of dot markers so that he/she can match the colors and trace the letters with dots.

There are so many great skills to love about this simple activity. Of course, it helps to develop letter and name recognition, but I love doing dot marker names because it offers an experience to learn more about letters without putting pressure or making it “feel” like a learning activity. This is also a great way to help your child begin to build concentration.

Don’t you love when a simple little activity packs such a great big punch for little learners?

Dessa has a lot of determination to cover every single inch of the letters I write. Don’t worry if your toddler doesn’t have the same degree of enthusiasm for completely covering the letters. It’s a valuable learning experience, no matter how the finished name turns out.

Dessa cracks me up with her great big imagination. It’s impossible for her to use dot markers without pretending that the markers are “friends” and carrying on imaginary conversations with them. This 10-minute activity took about 30 minutes for her to complete because she stopped to play in the middle, which was fine by me. An active imagination is a healthy thing and her detour gave me more time to sit back and relax before we moved on with our day.

toddler playing with do-a-dot markers while tracing name

Once she finished playing with the “friends”, it was back to work, until at last her name was complete.

child using green, blue, orange, red and purple dot markers to trace letters in name

I’m telling you, this simple activity is a perfect way to keep your toddler or preschooler busy and is a colorful, fun way to work on name recognition. Give it a try and let me know how it goes!

The post Dot Marker Rainbow Name Tracing appeared first on Kinder Craze.


Easy 4th of July Hat Craft for Kids

$
0
0

How is it possible that the 4th of July is just around the corner? If you’re scrambling like me to add a quick and easy kid’s craft to your family celebration with minimal prep and materials that you probably already have in the house, you’re in luck! This simple patriotic hat serves as a great activity and makes for a fun and festive accessory for the 4th of July.

family wearing red white and blue construction paper kid craft hats for 4th of July

This patriotic hat craft was always a favorite activity in my kindergarten classroom. My students made colorful red, white, and blue hats as a fun Constitution Day activity in mid-September. I loved the project for that time of year because it was unbelievably simple and didn’t require a high level of skill from my kindergarten students that were still developing those fine motor skills. Little did I know that this would also serve as a perfect at-home activity for my preschooler and toddler.

Materials Needed

  • 4×24″ of red construction paper headbands* (1 per child)
  • 4×1.5″ strips of white construction paper (6-8 per child)
  • 9×12″ sheets of blue construction paper
  • Stapler
  • Paper cutter (optional, but it makes the prep so much easier!)
  • Glue sticks and scissors (these blunt end scissors are perfect for children who know how to cut independently and these plastic scissors were clutch for my toddler who wanted to be just like his big sister.)

*One quick note about the headbands: 

I always had 12×18″ sheets of construction paper on-hand in my classroom and I still love having the extra large paper size on-hand in my home, especially Tru-Ray construction paper because it’s extra durable and the colors are so vibrant. For this project, I stapled a 18×4″ and a 6×4″ paper strip together to create a band long enough to wrap around a child’s head. If you only have 9×12″ sheets of paper on-hand, it’s totally ok and you can still do this craft. You can just staple two 4×12″ pieces of red paper together to create the headband. 

Project Preparation

Preparing for this project is super simple and will literally require 5 minutes (or less) of your time. Even though it’s quick work, I highly recommend doing these few steps ahead of time without your kids underfoot because everything is more stressful and time-consuming if you’re trying to scramble to get ready for a craft project with little ones around.

All you need to do to get started is create a 4×24″ strip of red paper by stapling two smaller strips together, cut several 1.5×4″ strips of white paper that will serve as stripes, and print a sheet of stars for each child onto blue construction paper. (Most at-home printers can handle construction paper without any issues – just make sure you trim the sheet to standard 8.5×11″ size before you load it in the printer.)

supplies to make 4th of July hat craft for kids and toddlers

You can download a template and a set of printable instructions for a Patriotic Headband for FREE! Enter your email below to have the craft sent right to your inbox!

Creating the Patriotic Hat

Once the papers are prepped, you are ready to go! My daughter Dessa is a few weeks shy of her 4th birthday and she’s been working with scissors for over a year. She has cut complicated shapes from paper in the past, but I wasn’t sure what to expect when she worked on cutting out her stars. I encouraged her (as I always do) to begin by separating all of the star pieces, then to cut each star individually. I was mentally prepared for her stars to be unrecognizable, but she did an amazing job.

Please don’t stress if your child’s cutting skills have a long way to go. Give him or her an experience with cutting the stars if they’re ready, or you can cut the stars for your child as I did for Harvey. He had a lot of fun just holding his pre-cut stars and plastic scissors. I gave him a few scraps to play with, which he held next to his scissors and proudly exclaimed “cutting!” Even if you do all of the work, simply providing your child with an experience while they interact with the supplies is good and meaningful activity for him or her.

kids cutting out stars to create 4th of July craft

Once the stars were prepped, it was time to work on the hat! Use the glue stick to glue the white paper strips onto the red headband. I spoke with Dessa about giving her strips “good space” and not squeezing them together and she did a beautiful job.

gluing white construction paper strips for patriotic kids paper craft

gluing red white and glue 4th of July hat craft for kids

After a minute or two, the stripes were all glued into place and it was time to add blue stars to our patriotic hats. I once again reminded Dessa to “give her stars good space” and she quickly went to work.

Harvey, meanwhile, insisted on having a glue stick of his own to work with. This certainly wasn’t an activity that he could handle independently, so I guided his hand as he placed glue on the back of blue stars and white paper strips. He felt so proud to be using glue like his big sister.

gluing blue stars onto red and white patriotic kids hat craft for 4th of Julyglueing blue construction paper stars onto 4th of July patriotic kids hat craft

Once the stars were glued, the kids’ work was complete! I wrapped a paper band around each child’s head, held the two ends together while I slipped it off their heads, and stapled the hat closed. My kids were so excited about their new 4th of July hats, it was hard to get them to sit still for a photo!

red white and blue patriotic hat craft for kids

Eventually, the excitement calmed down enough for us to head outside, set up the tripod, and snap a quick group photo. This was such a fun project and I’m sure your kids will love it too!

family celebrating 4th of July by wearing patriotic red white and blue hat kid crafts

The post Easy 4th of July Hat Craft for Kids appeared first on Kinder Craze.

Announcing the Fresh New Look of Kinder Craze

$
0
0

You may notice that things look a bit different around here and I am beyond thrilled to finally share the fresh new site design with you today! This update has been a labor of love that I have spent the past nine months planning and preparing to launch. Everything has been overhauled- from the Kinder […]

The post Announcing the Fresh New Look of Kinder Craze appeared first on Kinder Craze.

17 St. Patrick’s Day Picture Books for Kids

$
0
0

St. Patrick’s Day is a holiday that celebrates the rich culture and traditions of Ireland. One of the best ways to introduce children to this festive occasion is through books. Picture books can provide a fun and interactive way for kids to learn about leprechauns, Irish folklore, and the history of St. Patrick’s Day. In […]

The post 17 St. Patrick’s Day Picture Books for Kids appeared first on Kinder Craze.

15 Spring Picture Books Your Students Will Love

$
0
0

Spring is in the air! It is filled with new growth, fresh colors, baby animals and a renewed sense of life.  It’s one of my favorite seasons! Add some spring to your lesson plans with these spring picture books. Your students will love learning more about spring through these books. 1. Goodbye Winter, Hello Spring […]

The post 15 Spring Picture Books Your Students Will Love appeared first on Kinder Craze.

Viewing all 239 articles
Browse latest View live


Latest Images